Hard Ties for Hauling
Your Bike
|
Zero Compression - Solid
Steel - Instant Attachment for a quick and easy haul!
|
|
Borrowing from the technology of the
Moki EZ Lock Tie Down Systems, I wanted
a similar, solid tie system for my trailer, which already has high end
LA Wheel Chocks and will not accommodate the Moki wheel chocks, which
are an integral component of their system package. If you are running
with a flat bed trailer, or other trailer that can handle the complete
Moki system, They come to your door ready to bolt in place, with no
modifications or calculated attachment points to worry with, but if for
some reason, like myself, you simply can't use the whole system, and
have the ability to modify parts, the non-chock system components are
all readily available and easily acquired, for a total cost of around
$150 per bike.
The Hard Tie System has some good points and bad points, so whether
it's right for you is purely a personal decision.
Pros:
Almost instant bike attachment to your trailer, with no adjustments
after initial setup.
Solid steel components won't wear out, won't break down over time,
and can't be cut by vandals. No need to replace every few years.
Zero compression of your bike's suspension means it's bike friendly
AND operator friendly!
Nothing touches your bike but two permanently mounted chrome frame
clamps. No paint or chrome marring, no padding the bike parts!
Fail Safe! Even if one side has a complete failure, the other will
prevent the bike from falling off the trailer, and if coupled with a
clamping type wheel chock, it will continue to hold the bike upright and
in position. No need for backup ties or safety straps.
LOCKABLE! By utilizing padlocks in place of linch pins, you can
lock your bike to the trailer! (This could be defeated by a crook with
lots of time on his hands, by twisting the bars four million times until
the ends fall out).
Cons:
Expensive! Compared to common tie down straps, the Hard Tie system
is about three times the cost per bike of ties and straps.
Permanently attached hardware on the bike. While this is a "pro"
for convenience, it is a "con" for aesthetics.
(Makes for good conversation though at bike-nite meets! ;-)
Not "Universal". Because of the installation of bike specific frame
clamps, this system does not lend itself to hauling other non-fitted
bikes. Rescuing or hauling a friend's bike would still require the use
of tie straps, so don't throw out your old straps and hook anchors!
Having your bike solidly connected to the trailer means your bike
may be subject to more vibrations, depending on the suspension qualities
of the trailer. Strap ties do allow more of a buffer between the bike
and trailer because there is no metal to metal contact between the two.
Similar systems have been used for years by many people, but if this
ever proves to be a problem for me, rest assured that I will make that
known on this page!
WARNING!
Your bike trailer MUST HAVE adequate leaf
spring or torsion bar SUSPENSION to accommodate a hard tie
system without issues. My Baxley Trailer has NO SUSPENSION other than
two thick rubber pads that the axels rest on, therefore, with much
regret, after four years and over 6000 thousand miles of transport, I am
removing my hard tie system from this trailer, as I have experienced
five broken eyebolts over this period due to rough road conditions and
lack of pothole absorbing wheel travel on the trailer. Each time an
eyebolt popped, the second bar held the bike securely, and I didn't
notice the broken part until I reached my destination, but I have come
to the conclusion that THIS trailer is simply not suitable for the hard
tie system, but I love the trailer more than I do the hard ties, so I've
gone back to the traditional tie down systems.
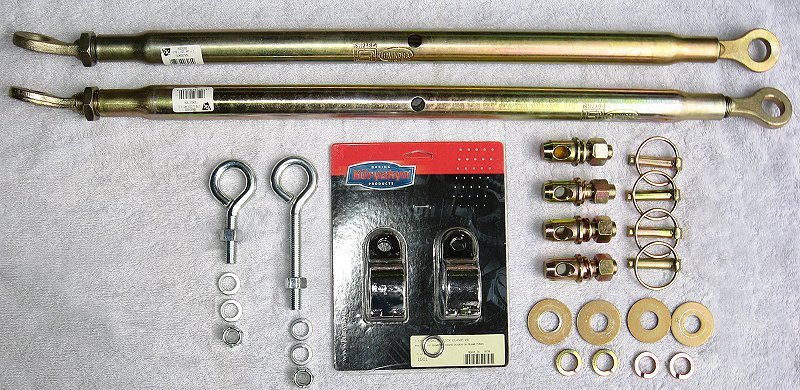
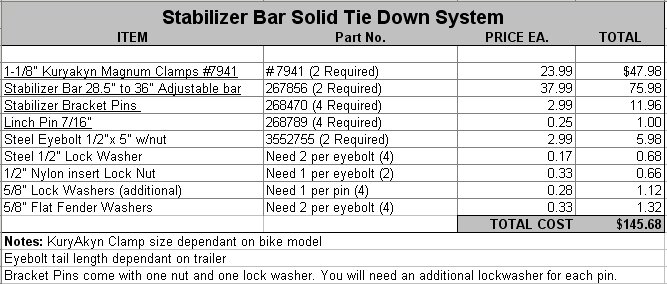
Sources: Except for the
KuryAkyn Magnum Frame Clamps, all the
necessary (3 point hitch) components are available directly from
Tractor Supply Company,
and your local hardware store.
Tools: Drill with 1/2" Bit, Adjustable Wrench, 3/4" Wrench,
Dremel Tool with Tungsten Carbide Cutting Bit, Centering bar or other
similar rod.
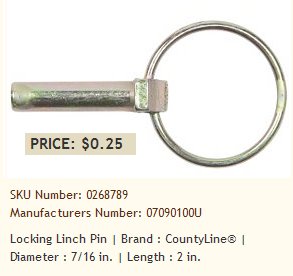
Hardware: All prices shown on this page are per the time of
this writing (2011), and subject to change without page updates!

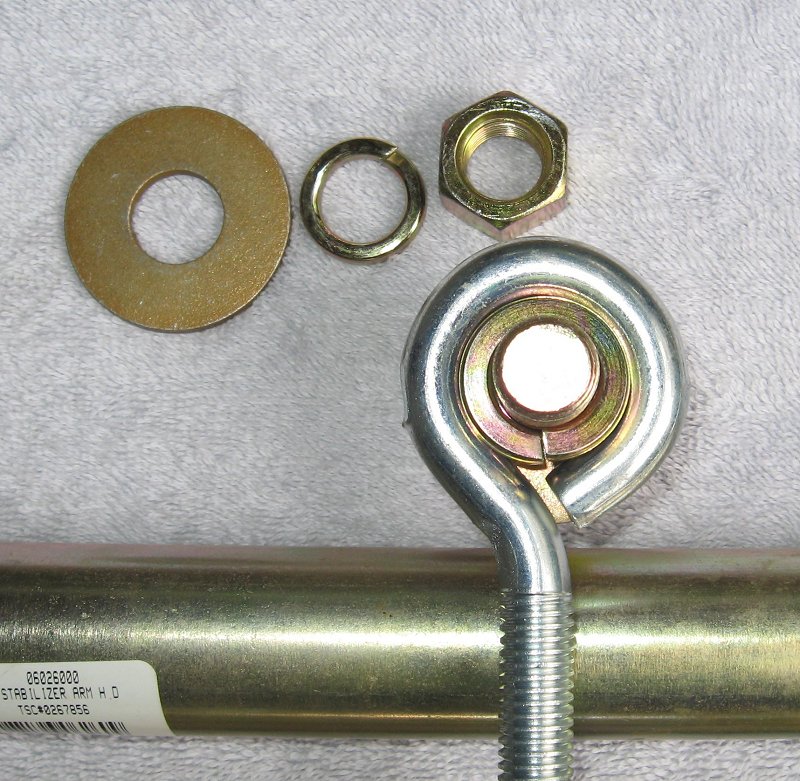
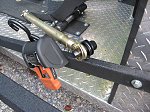
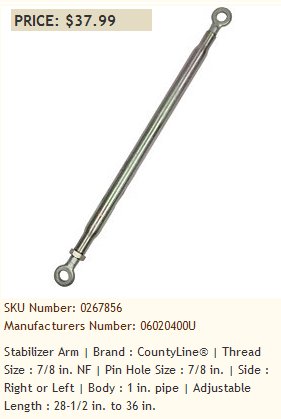
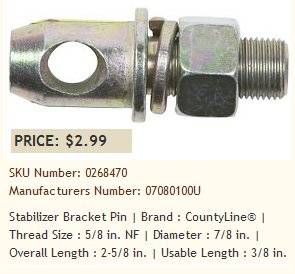
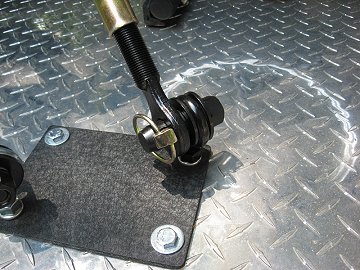
To create "base pin" assemblies for the trailer,
simply bolt a bracket pin through an eyebolt, using two fender
washers on either side, a lock washer on the nut side, and an
extra lock washer in the center of the eyebolt. This extra lock
washer will compress into the center of the eyebolt and serve as
a centering spacer to prevent the bracket pin from shifting in
the larger eyebolt hole. (note: you might find it easier to fit
the extra washer in the eyebolt if you snip off a 1/8" piece
with some bolt cutters or Dremel cutoff wheel.)
Use a one inch wrench, socket, or adjustable wrench
on the pin nut and a centering bar or other long bar inserted
through the linch pin hole to hold the pin while tightening down
the nut.
|
 |
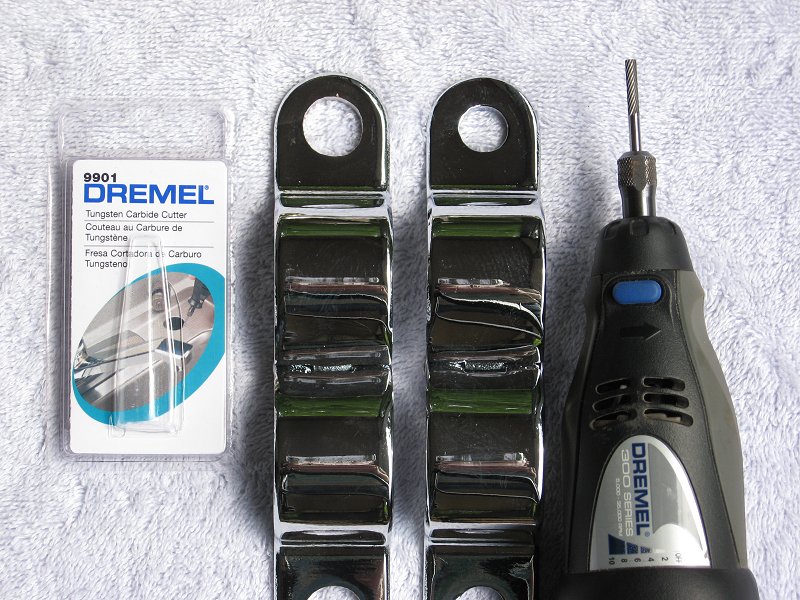
By far, the
hardest part of this whole project is increasing the hole size
in the KuryAkyn Magnum Clamps to accommodate the 5/8" thickness
of the bracket pins. Those Kury clamps are HARD STAINLESS STEEL!!
I found it useless to try to drill the holes out
larger, and ruined a $15 5/8" bit within minutes on the first
attempt. I found that a Dremel Tool with a Tungsten Carbide
reaming bit would cut the hard metal without a lot of effort,
but prepare for some "whittling" time. It takes about 15-20 minutes
per hole to slowly ream them out to size.
Tip: Wear gloves, protect your eyes and skin,
and work outdoors. Those reaming bits throw out millions of tiny
slivers of sharp edged steel which can become instant splinters!
I put a fan beside me to help keep the steel splinters blown
away from me and off my clothing.
|

|
|

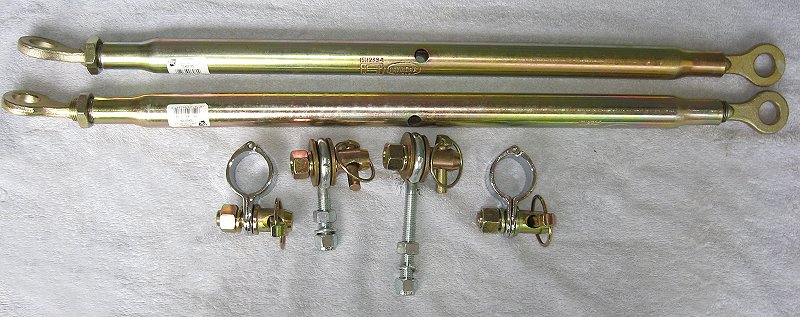
Sub-Assemblies are now complete, and we're
ready to move out to the bike and trailer!
|
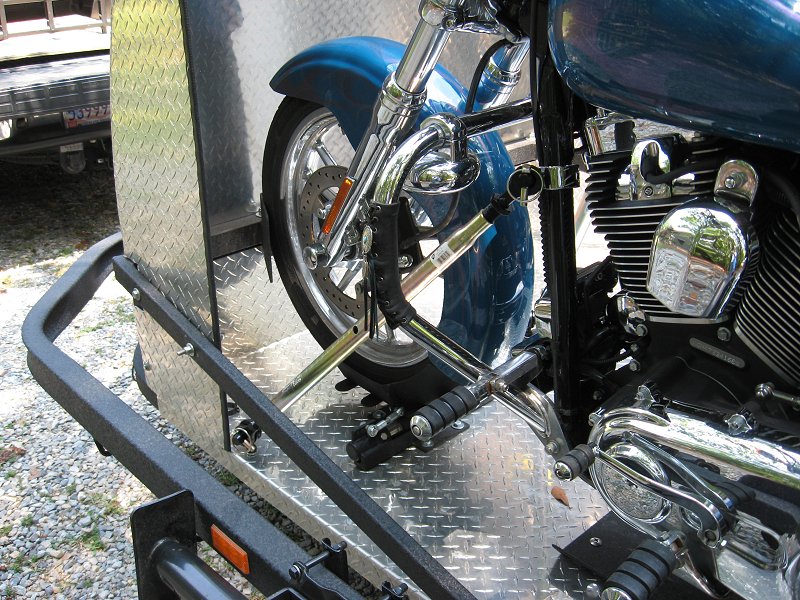
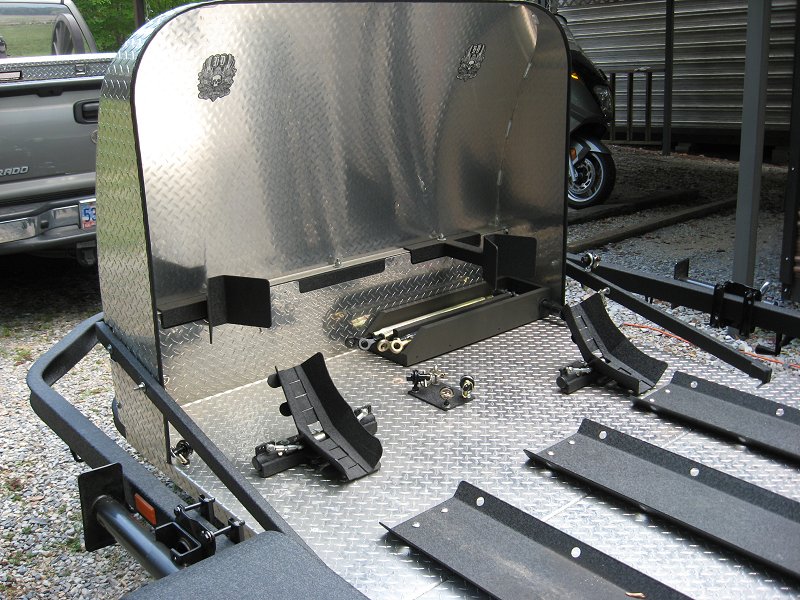
You will need
to set the bike up on the trailer to determine exact locations
for the base pins on the trailer and the Kury clamps on the
bike. If you're not using a clamping wheel chock, have someone
sit on the bike and hold it upright or lightly secure it upright
with tie straps.
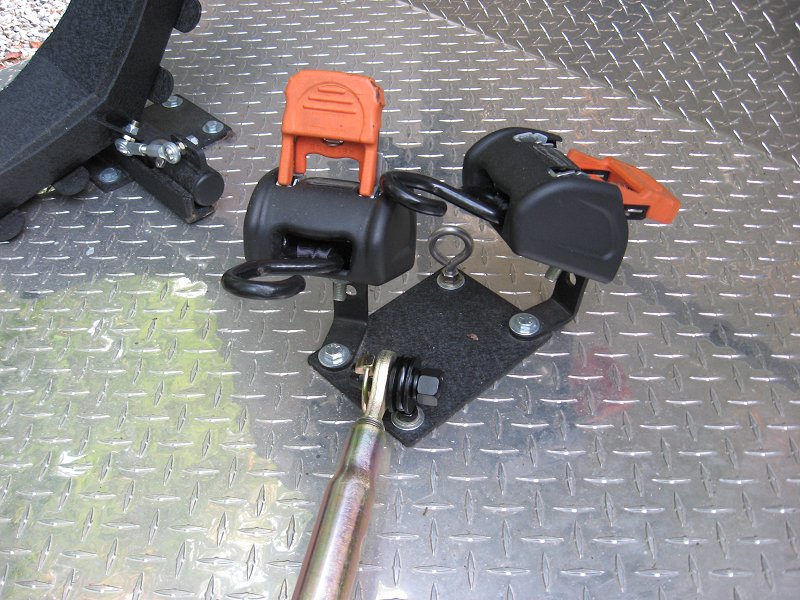
Base pins assemblies should be located at a strong frame member
on the trailer. Lightweight flooring material will not support
the system.
|
|
|
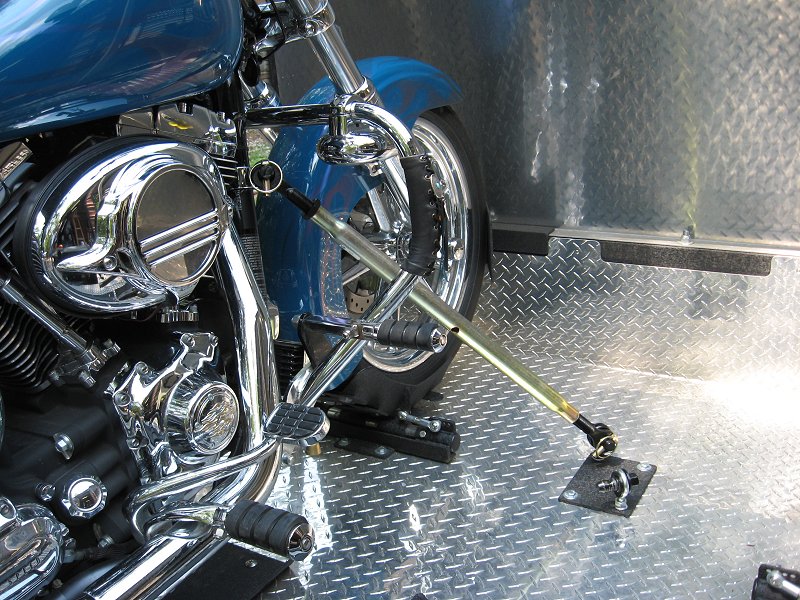
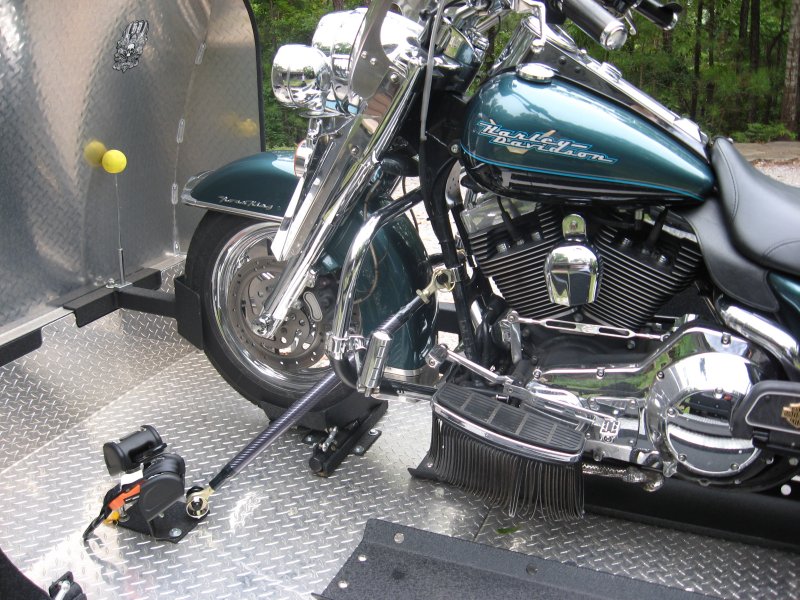
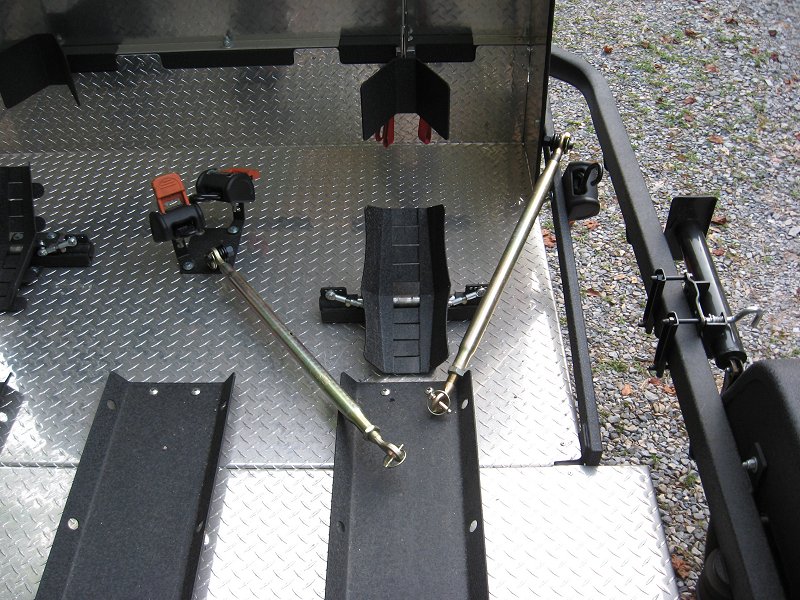
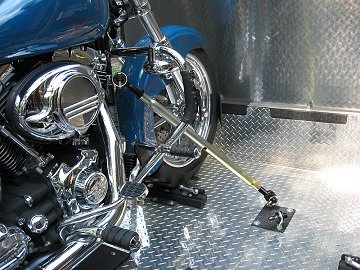
The base and bike pins should be oriented
parallel so the tie bar can easily slip off one side and in one
direction. This can be inside toward the fender or outside away
from the bike. Just make sure you have adequate fender clearance
to the pins, nuts, or brackets with the bike fully compressed or
you'll be mad at me later!!
Additional large fender washers should be used
on the base assembly eyebolts if mounting to a wood floor.
|
 |
|
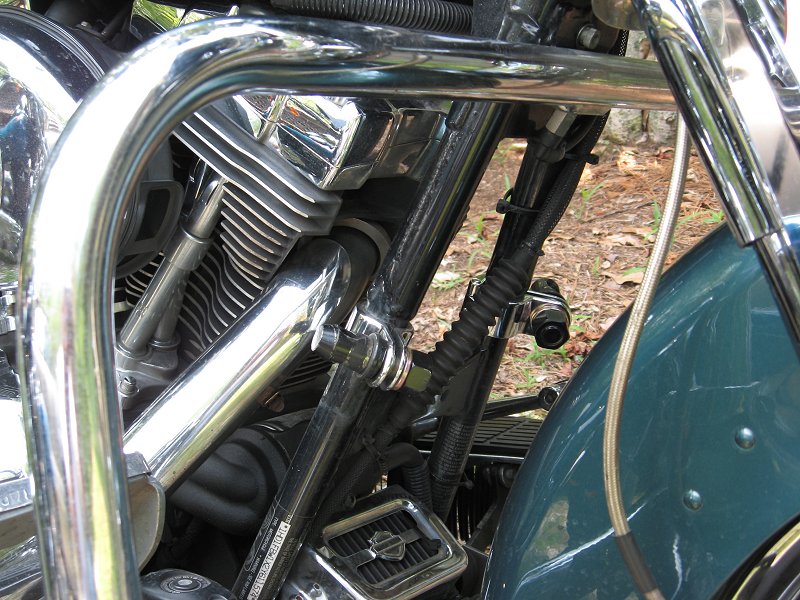
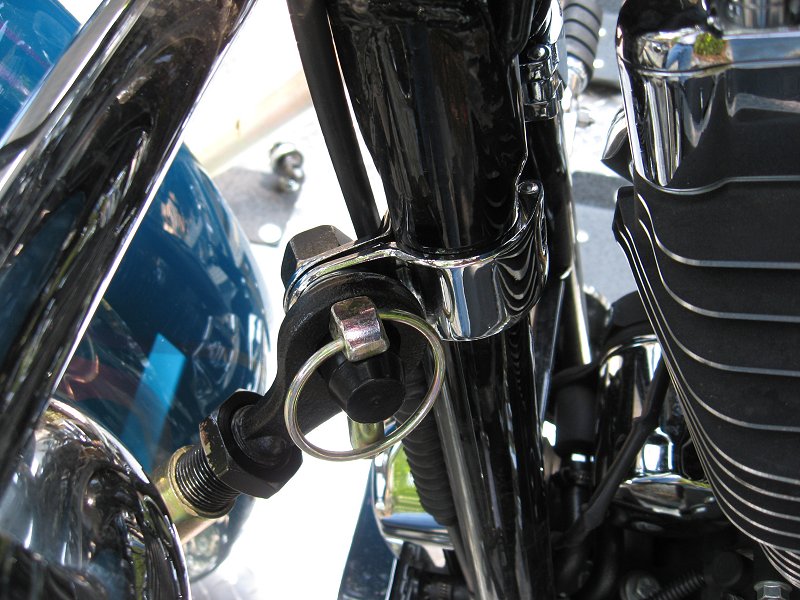
Although my bike pins are a little more
noticeable oriented to the outside, I prefer working the bar
outward, away from the fender. This is an easier attachment and
less vulnerable to accidental paint damage.
Note: For better clearance between the bar and
the Magnum clamp, use a 5/8" lock washer on BOTH sides of
the clamp. This spaces the pin out just a tad so the bar doesn't
ride against the chrome bracket surface.
|
 |
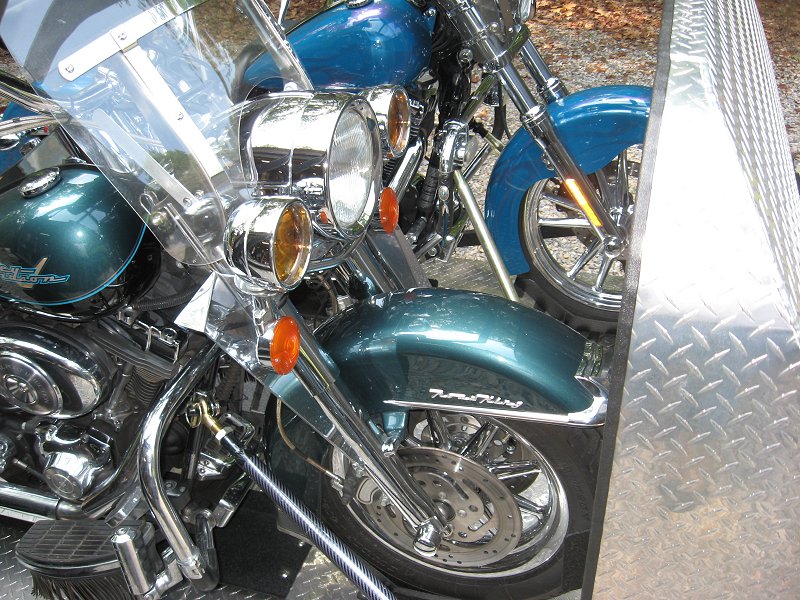
|
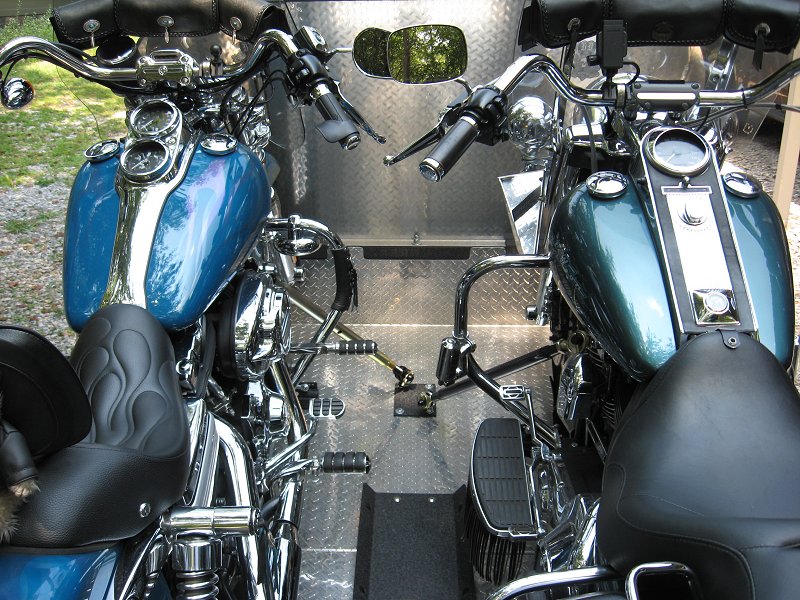
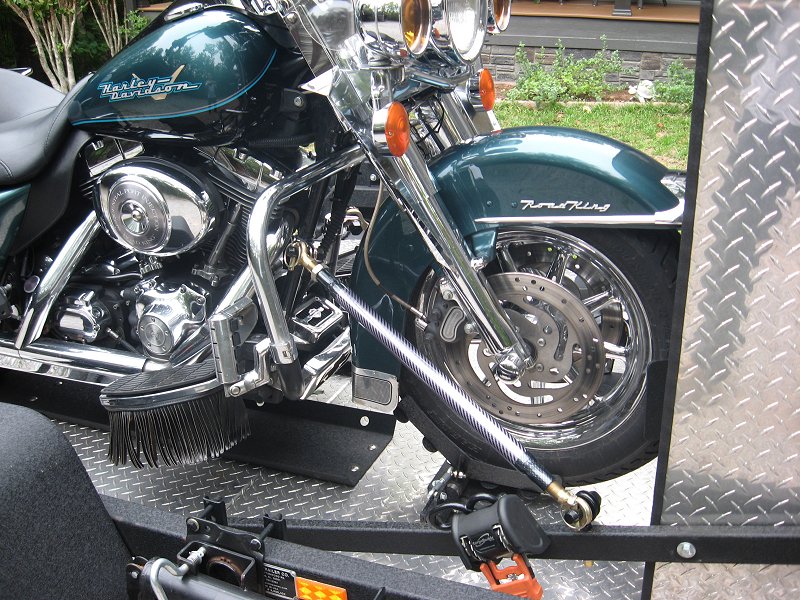
Two bikes, strapless and ready to roll!!

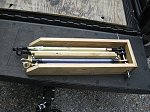
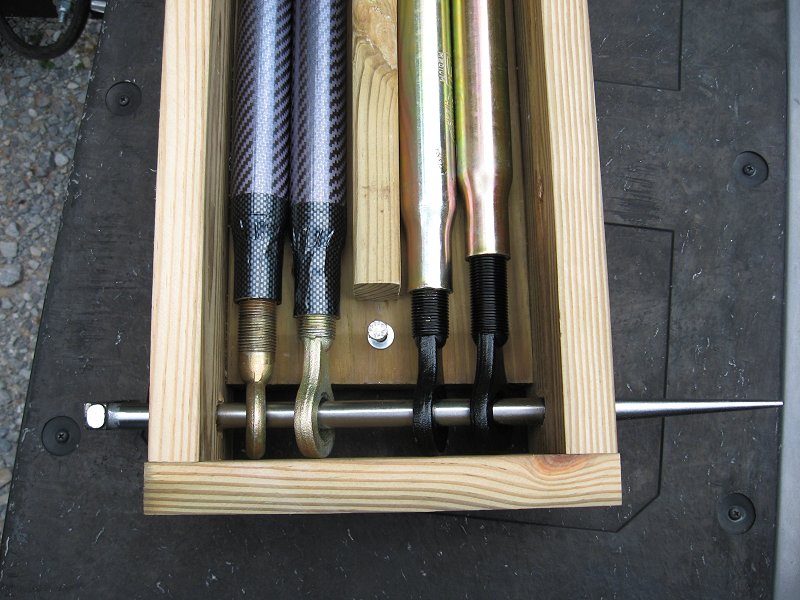
To finish off this project, I painted the
small parts with satin black engine paint and baked them for a
bit at 350 degrees, then I ordered
some
1.5" PVC heat shrink protective tubing for the stabilizer bars.
This thick PVC covering will help protect them from
banging against other metal parts of the trailer and bikes, give
them some extra weather protection,
and tone them down to all black. (The Road King set in the
photos above is
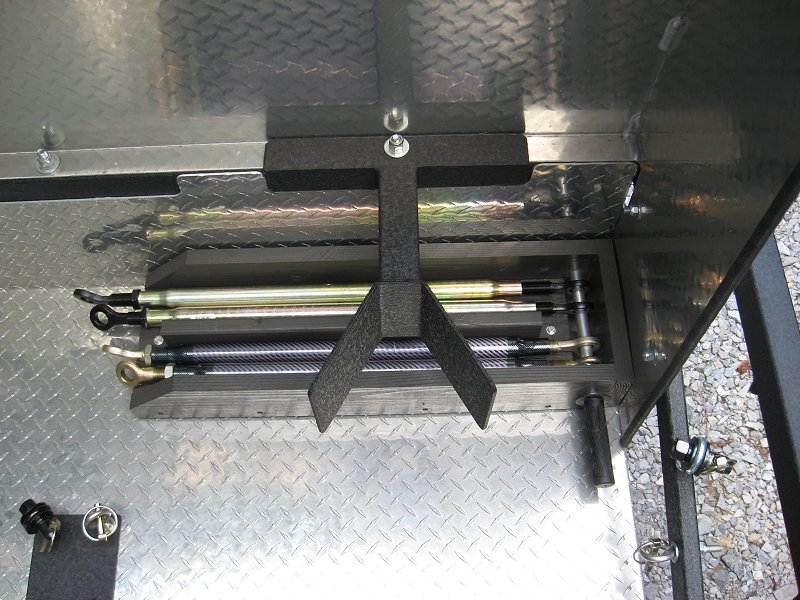
temporarily covered with carbon fiber wrap.) and finally I added
some 1 -3/16" rubber pipe seal rings just to keep them from
laying flat on the metal floor of the trailer.

|
Gallery
|