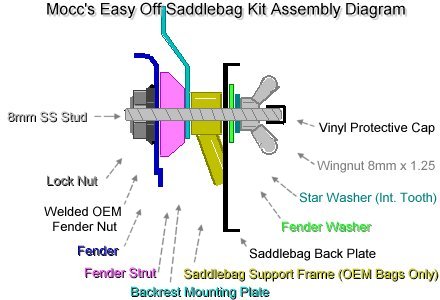
Mocc's "Easy Off"
Saddlebag Mounting System
|
A low
cost alternative to
"Quick Detachable" hardware for
the LC & C90 Boulevard
Please Note: I
no longer sell Easy-Off Kits, but have left instructions
for building and installing your own kit with common
hardware store components, for the benefit of all
Intruder owners.
|
|
Tired of having to fight with your saddlebags,
backrest, fender and wrench all at the same time, just to
check your brake pads or clean the rear wheel?
Now you can pull your bags in 10 seconds with no tools
and no lining up parts for re-assembly!
Designed as an inexpensive alternative to "Quick
Release" type systems, for full time bag users,
Mocc's "Easy Off" concept replaces your fender
bolts with stainless steel threaded studs, wing nuts and washers for quick and easy removal of your
saddlebags.
Just reach inside the bag, spin off the wing nuts and
pull the bag and support bracket off, do your business,
slip the bag and bracket back on, and tighten the wing
nuts. No dropping of the rear fender, no slipping of the
backrest support, no wrenches, ratchets or extra helpers
required.
|
Note-This system is intended for full time bag users
only. Riding without the bags, will leave
unsightly threaded stock protruding from your fender
struts. Not KEWL!
|
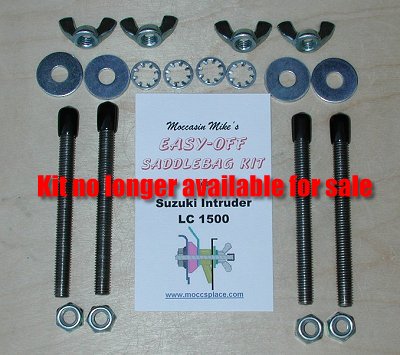
Standard Studs - Fits Suzuki
Side Buckle bags and most custom bags - Normal Stud Length
3.75"
|
|
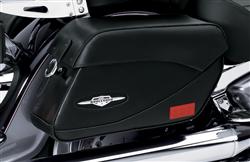
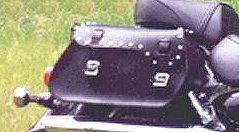
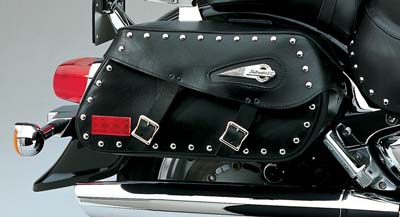
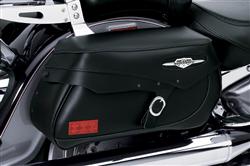
Early style Studded Leather with side buckle closure |
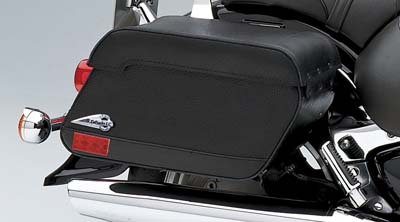
Late style Leather with side buckle closure |
C90T Stock Bags |
 |
 |
 |
1.) First, reach behind your rear fender and feel for
one of your saddlebag bolts protruding through the fender.
If it protrudes more than a few threads, make a mental
note of that.
2.) Remove one saddlebag mounting bolt and measure its
total length including the head, and subtract any excess
protrusion from the rear.
3.) Now add one inch to the resulting measurement for a
total cut length of 8MM x1.25 pitch threaded stock (Sometimes referred
to as "All-thread").
4.) Cut four pieces of threaded stock to your
measurements. (If it ain't stainless, it will rust on the
ends.) Cutting is best done with a cut-off wheel, but can be done with a
hacksaw or band saw if necessary.
5.) Smooth down the ends and repair any thread damage
with an 8MM x1.25 die. Quickest and easiest way to "dress" the ends is
to chuck the studs in a drill, then spin them against a running grinder
wheel. Round the ends off to prevent snagging your luggage or skin, and
buff them with a wire wheel.
6.) Purchase four each from whatever source you can find:
8MM Wing nuts, 8MM Fender Washers, 8MM internal tooth
lock washers, 8MM nylon insert lock nuts, and 5/16"
vinyl or plastic thread caps.
To avoid excessive fender drop, work on one side of
the bike at a time.
Start by removing one bag and support bracket, leaving
all other accessories in place. It may help to
temporarily place one of the bolts back into the fender
to keep it lined up.
1.) To create a grip surface for a stud, screw on two
wing nuts, facing each other, and hand tighten them
together. This will temporarily lock them into position
on the stud and give you something to grip.
2.) Now screw that stud into the fender until it
protrudes through the backside slightly more than the
depth of a nut.
3.) Reach up under the fender and place a common nut on
the protruding stud. Tighten the nut with a 13MM wrench
while holding the wing nuts steady. This will "lock"
the stud into place in the fender and prevent it from
turning when removing and installing the bags.
4.) Unlock and remove the two wing nuts, and proceed to
the next stud.
With both studs in place, simply slide on the bag and
support together, then from inside the bag, slide on the
flat fender washer, the internal tooth lock washer, and
the wing nut, and tighten by hand, then slip the vinyl
cap over the exposed threads of the stud to prevent
injury or damage. The 5/16" caps fit fairly loosely
so that they can be easily removed without damage.
As an added bonus, you might consider drilling a couple
of pairs of small holes in the rear of the bag and
securing the brackets to the bag with a pair of plastic
zip ties, so that it stays in place when the bags are off.
I have personally used one of these kits for 10,000 miles
without any of the wing nuts ever working loose on me.
However, as a safety precaution, whenever the bags are
opened, you should check the wing nuts for looseness.
|