Wall Hanger for your Detachables

A studly alternative for storing your stuff!


Here's a quick and easy way to store your detachables. Pick up a pair of 1/2" threaded rods from your local hardware store, and four nuts and fender washers to go with them, along with a few feet of 1/2" ID plastic tubing. (If you do not have exposed studs, pick up 8 half inch eyebolts with at least three inch wood screw shanks)

Now, assuming that you have exposed wall studs in your 
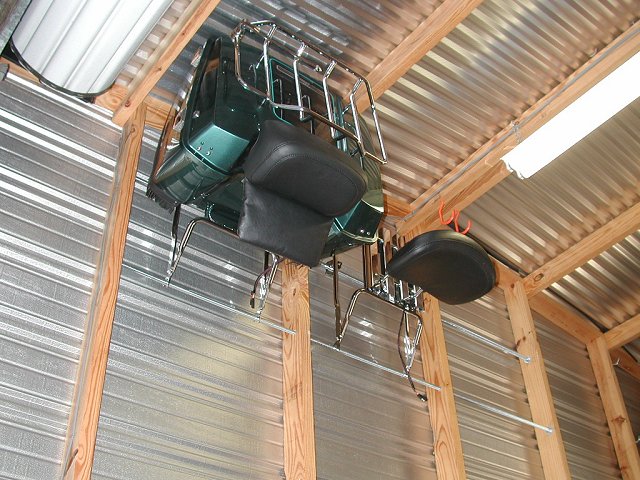
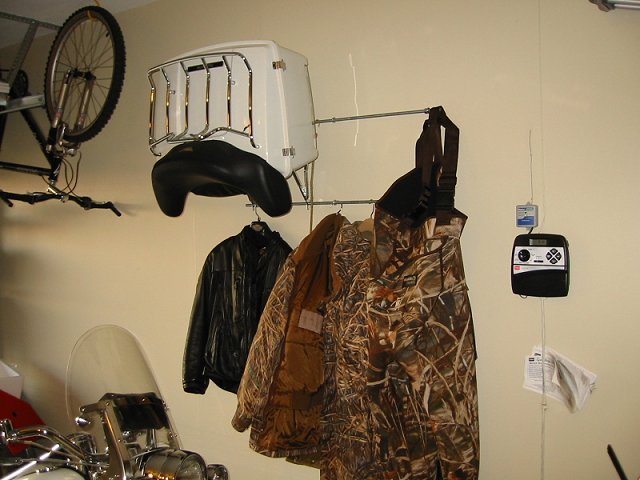
garage or storage building, level and mark locations for 9/16" holes spaced 12-3/4" apart top to bottom (for old style racks shown below). If your wall studs are on 2 foot centers, a 6 foot rod will span three spaces, or four studs. (If you do not have exposed stud walls, scroll down for MonkeyDave's eyebolt procedure)

If you have the newer stamped steel tour pack rack, you should set the rods 4-11/16" apart, and if you use a standard detachable backrest, you'll need rods set at 5-7/8" apart (Measurements are center to center). Thanks to "Hunt4570" for the additional measurements! :-)

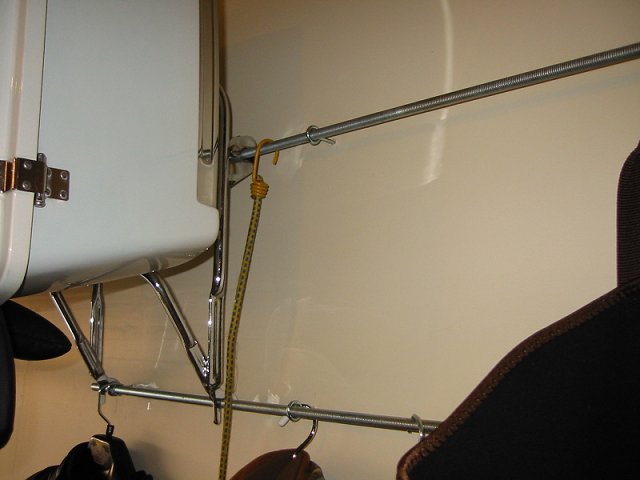
The threaded stock is just flexible enough that you can worry it into the lined up holes in the studs without bending it. Use 
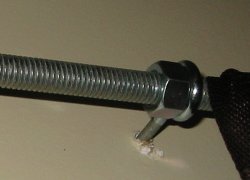
a flat washer and nut on the INSIDE of the end studs to secure the rod. I bought three feet of 1/2" inside diameter plastic tubing and cut it into four inch strips, then slid those strips on the rods to provide some protective cushioning for the detachable brackets.

Note: I set my rods exactly 13" apart, and although they are fine, the detachables have to be placed with the clip ends on the top, because there is just enough space for the short tang to slip under the top rod if I set them up with the clip ends down. Setting the rods at 12.75 inches apart should be a tight enough fit that you could place the detachables either way.

See the section below for storing windshields on this rack.

Click for different view

For those of you with really nice garages and workshops, that do not have exposed studs, You can use two rows of 1/2" eyebolts to support the rods.
 
Use a stud finder or other method to locate three studs in your garage or storage building, level and mark locations for drilling eyebolt pilot holes spaced 12-3/4" apart top to bottom. If your wall studs are on 2 foot centers, a 6 foot rod will span three spaces, or four studs. If your studs are on 16" centers, you will have some stud left over and may wish to trim it to fit, or just leave a bit hanging past the last eyebolt for hanging bags, helmets, or other stuff on.
 

Screw in all the eyebolts, leaving a little space (1/2" to 1") between the eye and the wall then slide the threaded stock through each line of eyes. Use a flat washer and nut on opposing sides of the end eyebolts (both outsides or both insides) to secure the rod. If you choose to use some 1/2" inside diameter plastic tubing to provide some protective cushioning for the detachable brackets, just cut the tubing into pieces that will fit between the eyebolts, and slip it over the threaded stock as you feed it through the eyes..

Note: I set my rods exactly 13" apart, and although they are fine, the detachables have to be placed with the clip ends on the top, because there is just enough space for the short tang to slip under the top rod if I set them up with the clip ends down. Setting the rods at 12.75 inches apart should be a tight enough fit that you could place the detachables either way.

To use this setup for a windshield, simply stand the windshield on the lower rod, and use a soft bungie cord. around the upper part of the shield, hooking the bungie to the rod on each side of the shield. You do not need a tight bungie cord. Just a loose fit that will keep the shield securely against the top rod is all you need. A rope with hooks on the end would do just as well.

Many thanks to my buddy MonkeyDave for sharing the eyebolt photos! Click the photos below for larger images.

Click for larger image

Click for larger image

My collection of H-D Projects and Pics


SNAKE-MAIL