Modified National Cycle Lightbar for the LC Intruder 1500 |
||
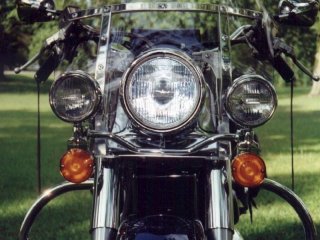
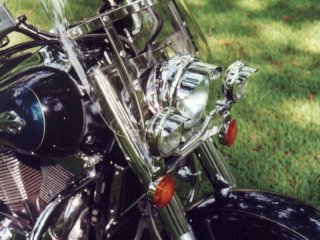
Time, patience, tools, a few skills, a little luck, and a wild hair once in a while can come together and make most anything fit your bike if you want it to bad enough. I recently modified a National Cycle Lightbar to fit my LC 1500 Intruder. National Cycle makes the style of lightbar that you see on most Harley Davidsons with the turnsignals "hanging" in line with the spotlights. I think this is the cleanest and best looking bar of any I've seen. The only problem is, they don't make them for the LC. They make them for many other bikes, and I have spoken with the tech department, but as of yet, nothing definate on developments for our Intruders. "Fine...I'll make my own!!" (The spot on picture left was a bit off aim when this shot was taken. Sorry, didn't notice that :-) |
||
| The following mods were done
to their model number "N933" National cycle
light bar for Honda Shadow Aero. This is where the luck
part comes in. Without being able to "tour" the
warehouse, I had to guess at a model to work with, based
on how it would mount to it's intended bike. The single
mounting tab for this model is a square "U"
shaped bracket welded flat to the back of the bar. The
modification is to re-work this tab to fit up under the
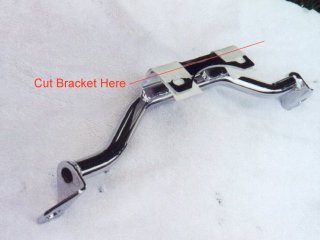
lower triple tree of the LC. Cut the last flat off of the back of the mounting bracket, leaving about 1/4" of the last bend intact (this will help add strength to the remaining bracket) then chock up the remaining bracket in a vise and bend the whole assembly forward until the light platforms sit level when the bar bracket is placed against the underside of the triple tree. It takes a lot of pressure, but go slow and bend only a small amount at a time and check the fit. Locate and drill two 5/16" holes to mate with lower triple tree mounting points. This task was simple for me, as I just used my windshield lower braket as a drill guide. This may also be possible with using the stock turnsignal bar as a guide. |
|
|
|
||
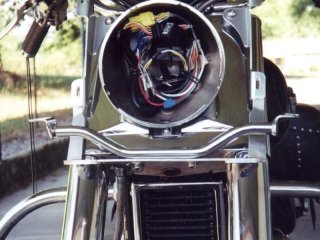
Mount the lights and turnsignals, feeding the wires through the bar, then bolt the assembly up to the lower triple tree, and wire it up inside the headlight. There will be aproximately 2.5" of wire exposed as it goes straight from the bar to the headlight casing. You can cover this stretch of wire with plastic hose, shrink tubing, or spiral wire wrap (Dennis Kirk sells the chromed spiral wire wrap that you see in the pictures). There is also a very short segment of wire at the outboard junction of the lights to the bar. |
|
|
| If you like this type of lightbar, you
should be aware of some of it's characteristics that you
may find unpleasant:
|
||
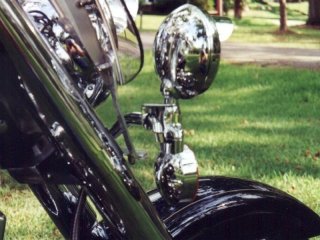
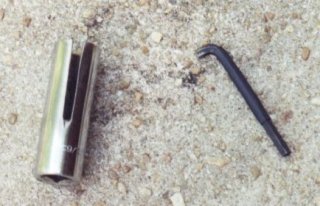
The instructions that come with the bar assembly tell you that in order to adjust the spots, you must first twist the signals to the side, to access the signal mounting hex screws, then remove the spot bulb and unwire the spot from the headlight housing and pull the wire out completely so you can get a deepwell socket around the spot mounting lug. You can make life much easier by creating a set of spot adjusting tools yourself. Take a 1/4" hex wrench and cut it off just below the bend so that the short side is only a stub, then it will fit the signal screw without having to turn the signal first. Now take a deepwell socket (9/16") and using a dremel or metal cutoff disc in your bench grinder, cut a slot all the way down one side of the 'working' part of the socket. This will allow you to slide the socket up into the spot lug area and let the slot fit over the wire. Now you can tighten or loosen the spot lug by 1/4 turn at a time without having to unwire it, or remove the bulb. |
|
|
Cost of the
lightbar was $199.99 plus a few bucks for bullet
connectors (to make wiring it in more friendly), and a
couple more for an extra 9/16" socket and hex wrench.
I also installed a set of Cobra 4.5" spotlight
visors. |
||
| Making it fit the LC was fairly easy, using only a common hacksaw, drill, and a good size bench vise. The hardest part was putting a hacksaw to a brand new $200 lightbar that couldn't be returned if it didn't fit!! J | ||
