Leather Tank Panel and Pouch for the LC Intruder 1500 |
||
| Harley Davidson's line of leather tank
panels for the Dyna Wide Glide series bikes, make great
Gas Door Panel Bibs for the Suzuki 1500LC Intruders. The Dyna series panels are almost a perfect size, and are the only ones without a pre-drilled mounting hole in the lower section. They come in a variety of styles, with or without small storage pouches, and can be easily adapted to the LC with only a few basic tools. So pull out your Visa card and pay a visit to your local Harley shop, then get out your drill, hacksaw and Exacto knife, and go have some fun! Warning!! You should visually inspect any panel that you are about to purchase to insure that the sides are cut straight from top to bottom, and not tapered in at the top. Most but not all tapered panels are listed as "Multi Fit" items. The taper does not meet well with the upper plastic panel on the LC. |
||
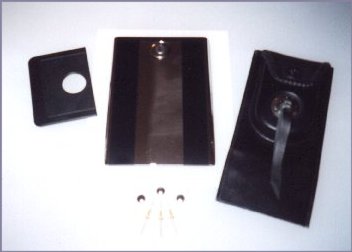
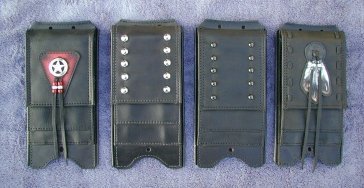
| The panel will come sewn to a plastic
backing plate, which is pre-drilled at the top, and has
an angled "lip" near the bottom on the backside. Cut the top mounting tab (with two holes) off straight across. Carefully cut the plastic first, from the backside, with a saw, then cut the leather with a sharp knife or razor blade. On the back side, grind or otherwise cut off the "lip" at the bottom. Now, find the center (side to side) and mark it down from the top approximately 1 1/8". Drill a small pilot hole and check to be sure it is centered over the ignition switch when placed over the door. If it is centered, bore a 1" hole here, being careful not to damage the flap leather (On pouched models, you are drilling right up to the leather flap.) |
|
|
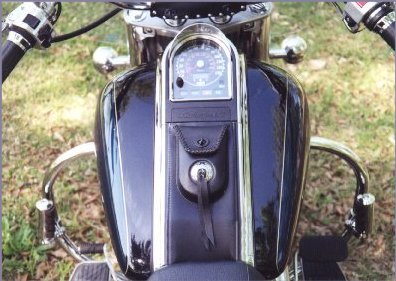
The Leather panel is about 3/8"
narrower than the upper plastic panel around the speedo,
so to help ease the visual effect of the width
differences, I used two strips of "Black Out"
auto trim tape down each side of the door, so it appears
that the leather is laying on a black background that is
the same width as the upper panel (see next frame). |
|
|
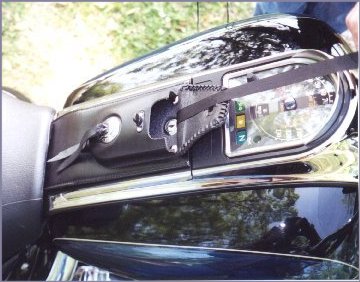
| An easy, but not totally secure
attachment method is to use two 6" strips of good
quality automotive adhesive moulding tape, available from
JC Whitney or possibly any automotive trim shop. This is
the same stuff Suzy uses to attach the black panels and
the chrome side emblems. It doesn't stick well to the
plastic backing of the panel, and may turn loose in the
heat of the summer. I prefer a more permanent attachment with rivets or riv-nuts and small screws. This way you don't have to worry about the panel flying off while your "cruizin". This particular panel is perfect for holding my small Cellular telephone. |
|
|
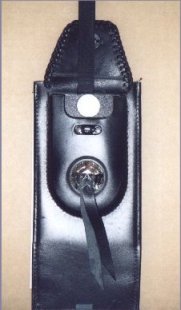
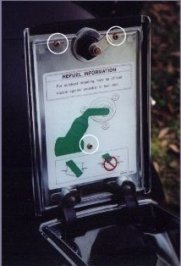
This shot shows the easy accessibility of the key lock on the door. I used rivets to install my panel. The two small chrome buttons in the corners cover two of the three rivets used to install the panel. A third rivet and button is hidden in the bottom of the pouch (see next frame). |
|
|
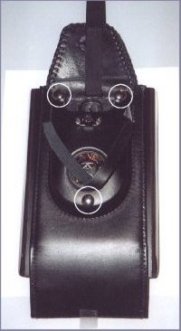
| I initially used three pop rivets. Two at
the top and one near the bottom of the pouch, all inside
the pouch. In the photo at right the chrome caps show the
approximate location of the rivets (the bottom one is
placed on top of the pouch for a visual reference). I put
the rivets in from the backside of the door, and used
washers and nylon bases for chromed screw caps on the
topside. After riveting, I capped off the bases with the
chrome studs. The purpose for the chrome stud caps is to prevent having exposed metal rivet ends inside the pouch that might scratch whatever I put in there. These rivets were replaced with riv-nuts and screws, to allow for interchangable panels. I plan to make one specifically for a communicator, complete with wiring and jacks, but only to use for occasional touring. |
|
|
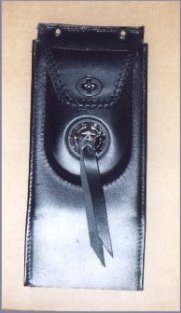
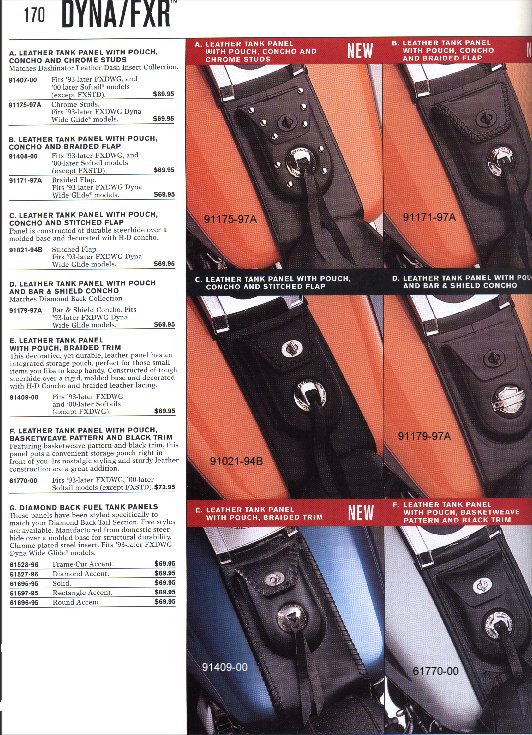
| The part number for the pouched and conchoed version with braided flap shown here is #91171-97. Lists for $79.95 (2011 catalog) | ||
Click here to see Tank Panel Options from the Harley Davidson Accessories Catalog |
||
| *Note: There are two styles which I do NOT recommend on the Harley link above. They are Item "E" Braided Edge, and item "F" Basketweave designs. These designs have extra thick, or welted edges and may not slide under the seat properly when the gas door is opened. | ||
Many thanks to my cyber friend "Ken" in Orange County, CA for the panel model info for this project |
||
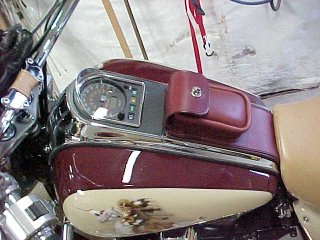
Ben's Heritage Panel |
||
| Heritage Saddlebag Company is now making a similar tank panel for the LC. It is available in several colors and with or without studs and concho. Priced at $60 to $80, and does not come with any type of mounting hardware. Mounting is user's choice, and here, moulding tape may be the only choice. I'm not sure if their panel has a key hole or not, so be aware that you may have to do a little homework as described above. This is a new item and is not currently listed at their website. If interested, you will have to call and ask for it specifically. No item number for it yet, but they say just ask for the Gas Door Panel for the LC1500. (Tell them Mocc calls it "Ben's Crotch Pocket"!! HAHA!!) J |
|
|
Timber Wolf Panels |
||
| Tim Wolf, with Timber Wolf Leather is doing some very fine handcraft work with panels and pouches for bikes and is familiar with the needs of the LC owner. | ||
|
||
If you are looking for a wider, flatter profile, high quality, easy to install panel or pouch with an individual touch for an equally reasonable price, check out Tim's website above. |
||