Stubbiing the LC Brake Pedal
(Many thanks to Jeff from LC1500.com for setting up this page and photos)
On the longer trips, I had wished there were a little more room for foot movement on the right-hand floorboard. The stock brake pedal is so large that it doesn't give you many options for foot placement. After reading that a couple of members of the Intruder Forum had resized the brake pedal, I decided to give it a shot.
The neat thing about this modification is that it can be carried out with simple household tools.
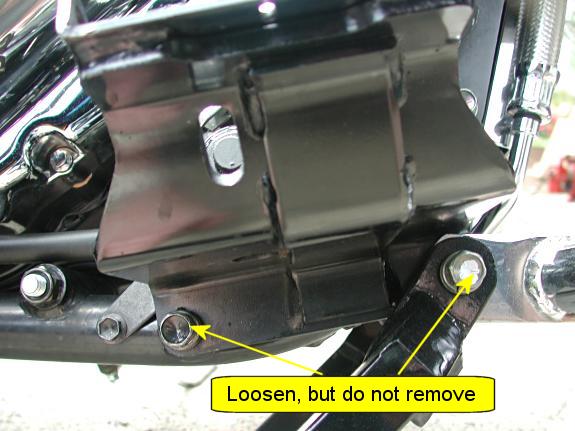
The first step is to remove the brake pedal. You will need to remove the floorboard and loosen the floorboard mounting bracket so that the pedal can come off the shaft. One circlip and the pin will pull out freeing the floorboard. Two 14mm bolts hold the bracket on. We just need to loosen the bolts, not remove them.

Once the mounting bracket is loosened, the pedal should slide off the shaft.
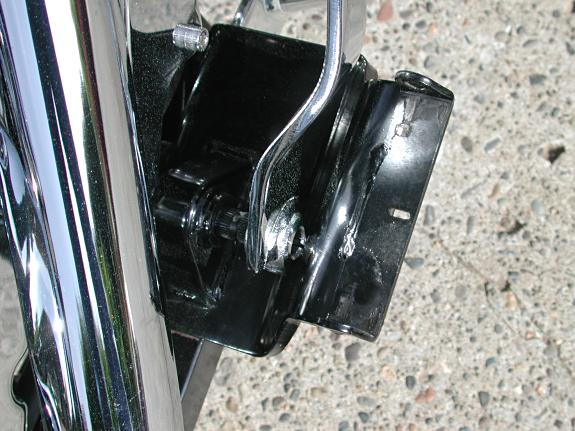
Now you can decide how much you want to shorten the pedal. I elected to shorten it as much as possible to give the most foot room. I kept the cut just outside the weld area. I left just enough space for the brake pedal pad to slip back over the lip.
A hack saw, file, sharp knife, and some glue is all you will need to make this mod. Power tools are optional :-)
After the pedal is cut, round the corners to match the existing corners so the pad will fit correctly.
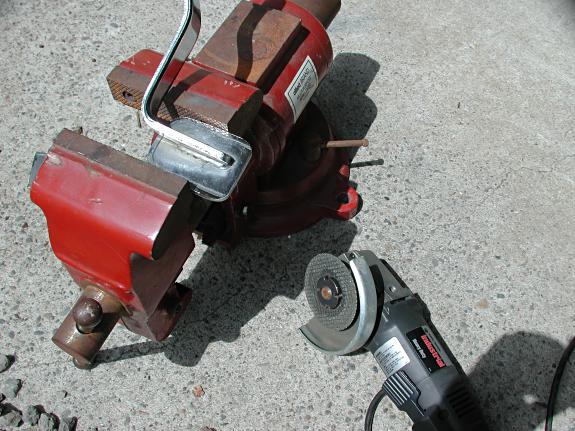
Once the corners are rounded, it's time to reinstall the pad. The pad will need to be cut down and refitted.
It's best to make the cuts in the middle of the pad (where it is the widest) It may not be obvious, but the pad actually tapers at the ends, so if the cuts are not made in the middle of the pad, you will be attempting to match up two different widths.
I got to the point you see below and then overlapped the remaining pad to see where it would need to cut.
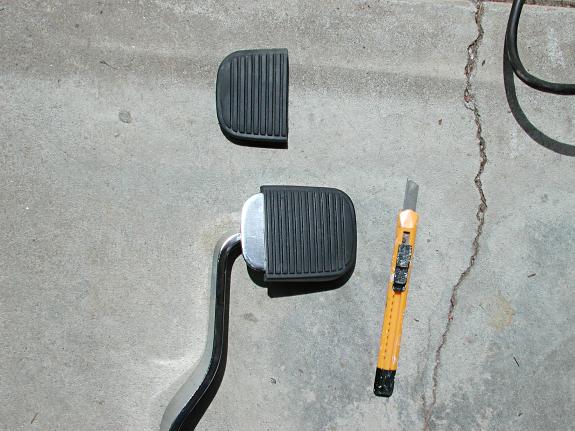
One other item to keep in mind when trimming the pad (purely for ascetic reasons) is to make one of the cuts right next to the ridge in the pad and make the other cut after the "valley" This will ensure that the "ridges & valleys" will still match up when complete.
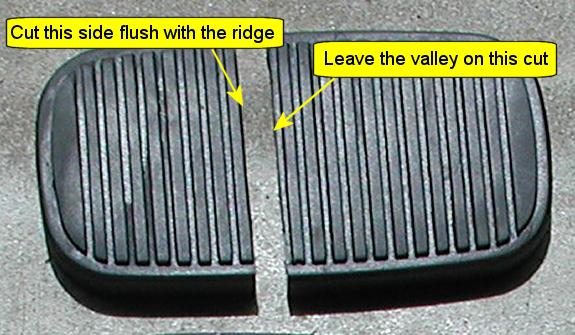
Once you have the pad trimmed, all that's left to do is glue it back on. I elected to use a two-part epoxy, but just about any glue should work. Once the pad was glued I installed a heavy rubber band around the outside to keep the edges of the pad down while the glue dried.
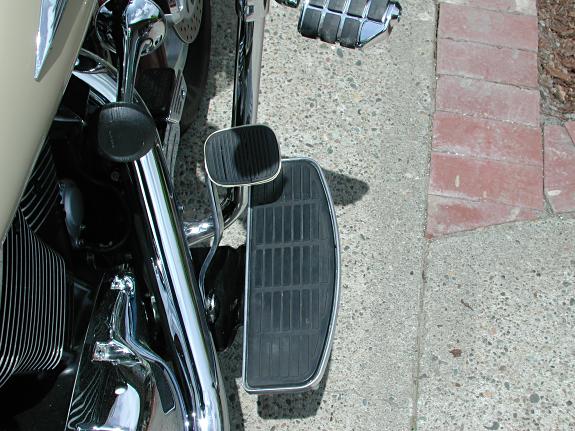
This is one of the cheapest and easiest modifications you can do. Enjoy the "new" foot room!
Now for the legal stuff: Perform this modification at your own risk! Suzuki elected to make the brake pedal a certain size for a reason; Either for ascetic reasons, safety reasons, or both. You may need to familiarize yourself with the different size of the pedal if you elect to perform this modification.