Pair Valve Removal Made Easy |
| by "Moccasin" Mike |
| ********************************************************* |
For Suzuki Marauder 800
NOTE** The only tools you will need for
this operation are a pair of pliers, a small hex (allen) wrench,
and a 10mm wrench. These can be found in your Suzuki Tool Kit. (Add
a second 10mm wrench if you plan to remove the cylinder studs).
This procedure will take about an hour if you work real slow. J
All metal components of the removal kits have been "Blackened"
with satin finish engine paint, and baked at 400 degrees to match
your engine block.
Many thanks to my buddy Joe MClain for taking the time to shoot these great photos during his DePairing procedure!!
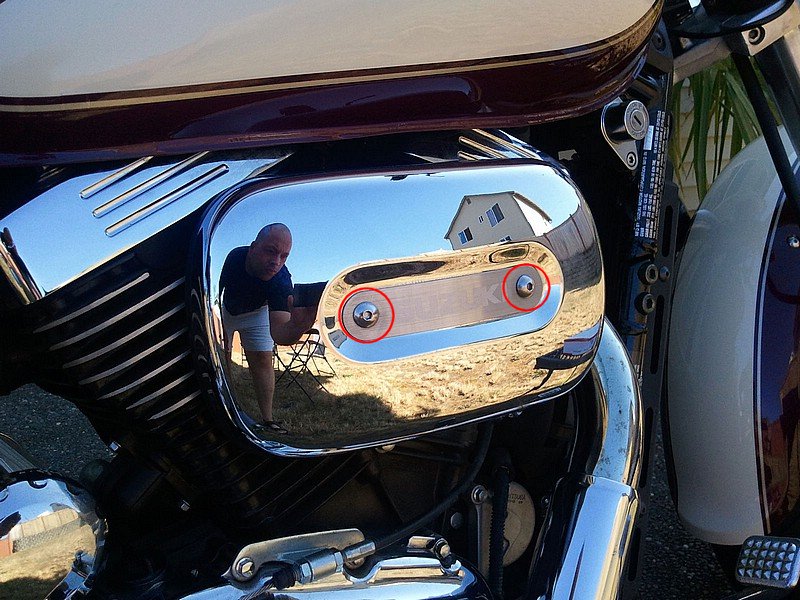
| STEP 1. REMOVE THE COVER |
|
If you only wish to disable the pair valve, but not remove any of it's components, insert a round headed screw into each of the two rubber air delivery tubes. Leave a small portion of the threaded end sticking out of the top of the rubber tube (for removal later if necessary), and re-install the tubes to the valve, then replace the cover.
|
|
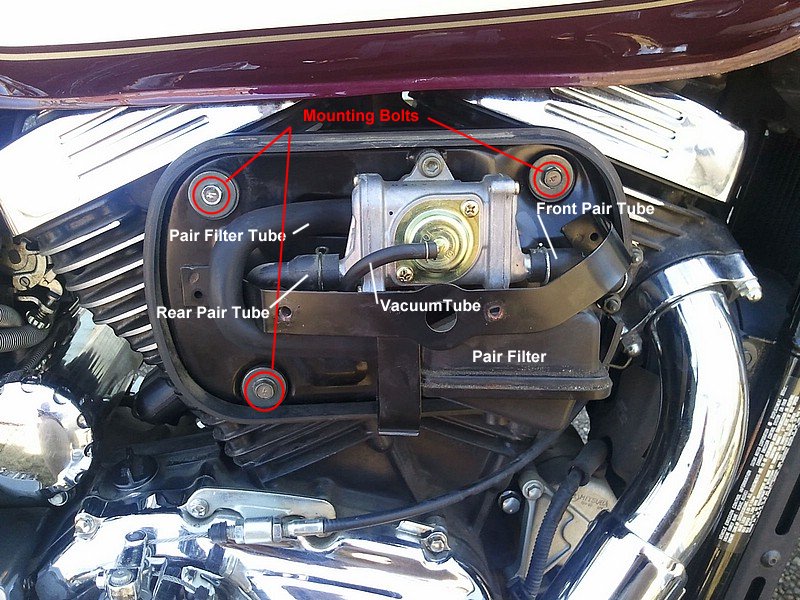
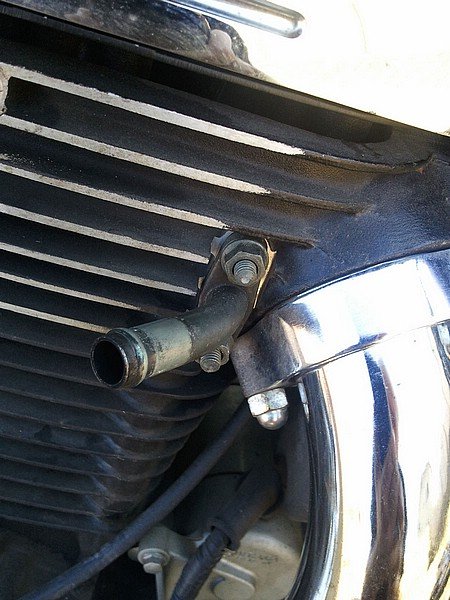
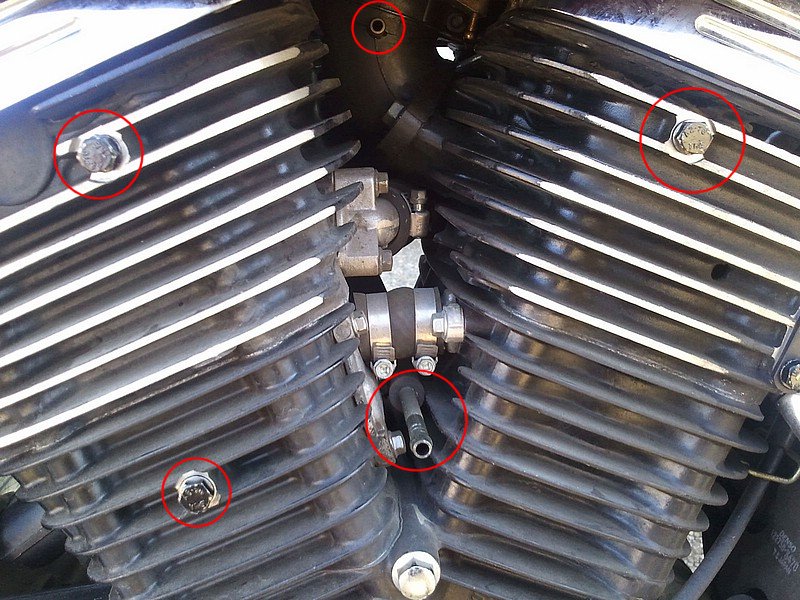
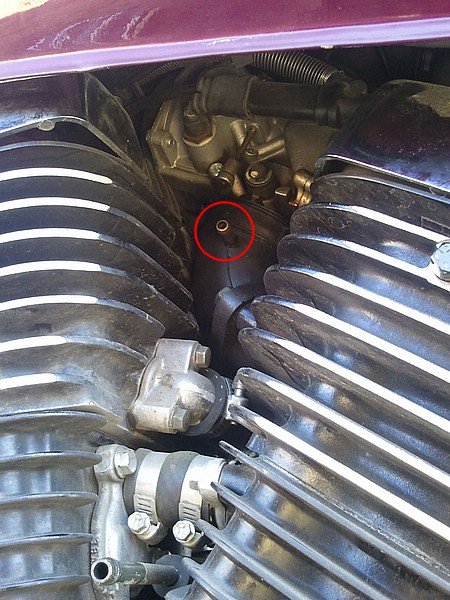
| STEP 2. CLAMPS, NUTS, BOLTS, TUBES AND VALVE HOUSING. |
· With a pair of long nose pliers (or your fingers) loosen and slide the tube hose clamps toward the center of the rubber tubing on the two air delivery tubes (the ones that go to the cylinders) and the small diameter vacuum tube. · Pull the rubber air delivery tubes and vacuum tube loose from the valve. · Using a 10mm wrench or socket, remove the three bolts that hold the housing to the cylinders (two upper corners, and lower left corner). |
|
|
NOTE: If you wish to retain the cover housing, you should remove it, to allow access to the vacuum nipple that must be capped, then you can remove the valve from the housing and re-install the housing.
|
|
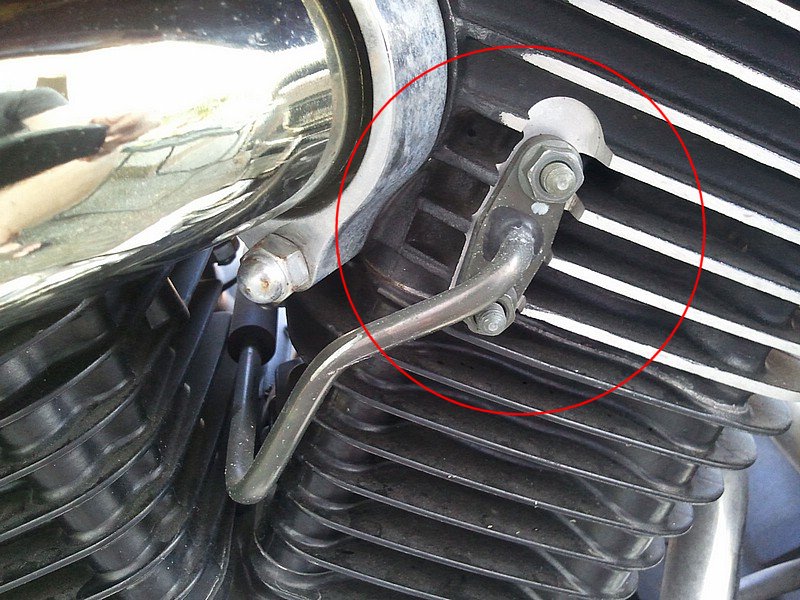
| STEP 3. TUBES |
· Remove the metal air delivery tubes from the cylinders, and make sure that no gasket material remains on the cylinder. |
|
|
|
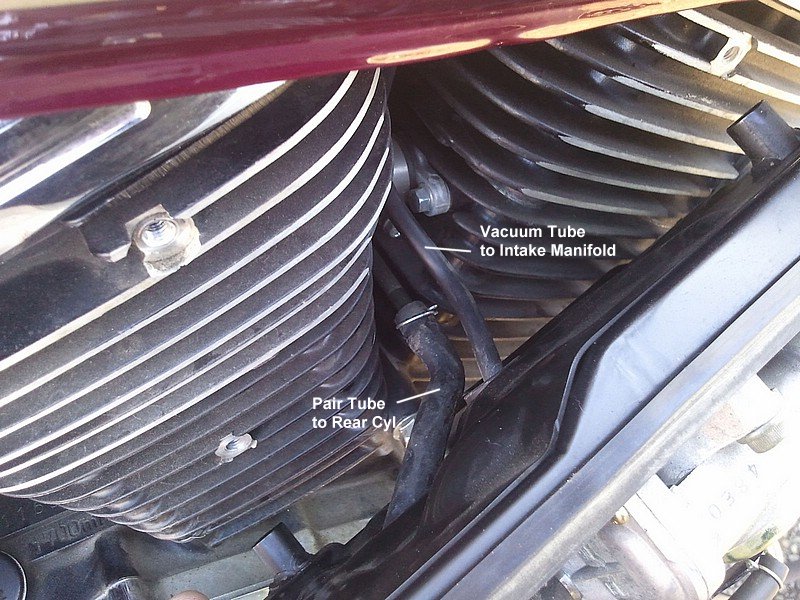
 Rear Cylinder - Left side of bike |
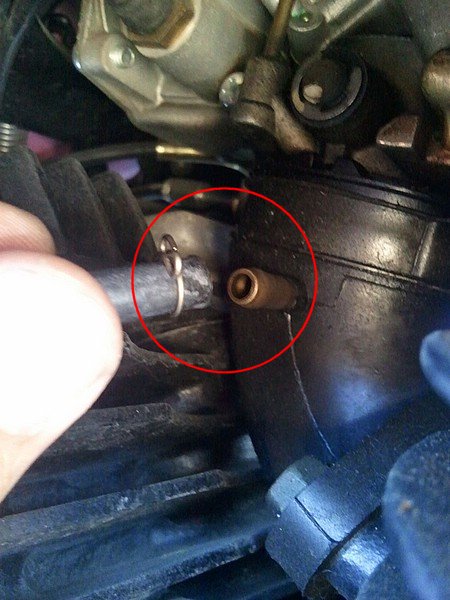
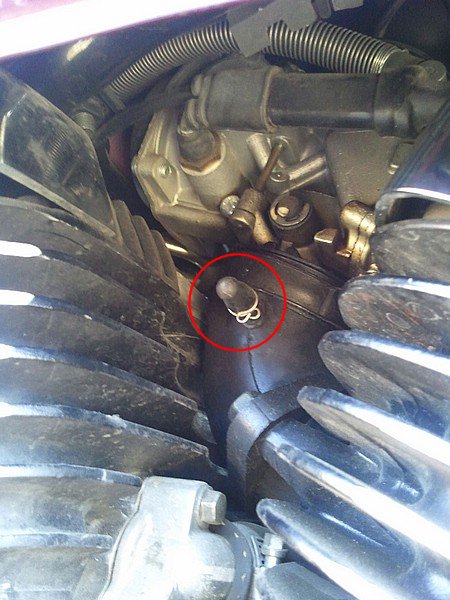
| · Remove the small diameter vacuum hose from the intake manifold (just twist and pull straight off) |
 |
| Cap off the manifold nipple with the rubber vacuum cap from the kit. |
 |
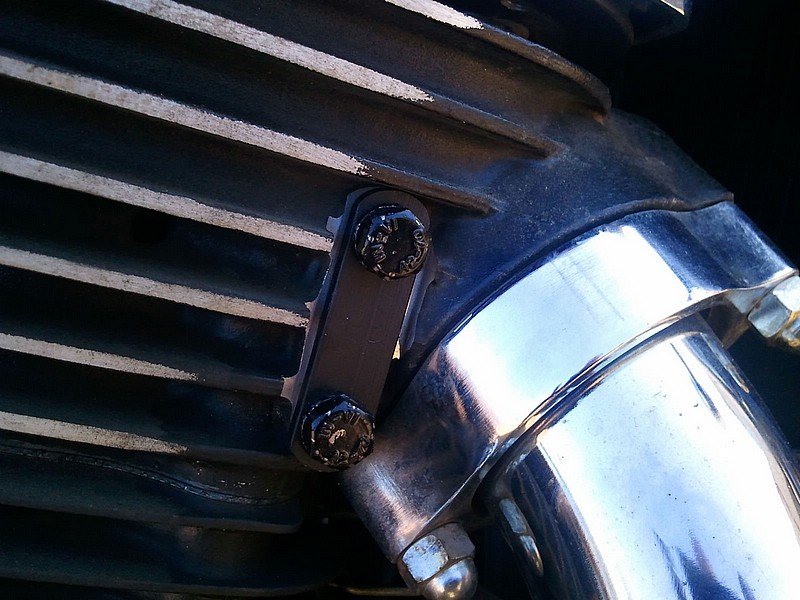
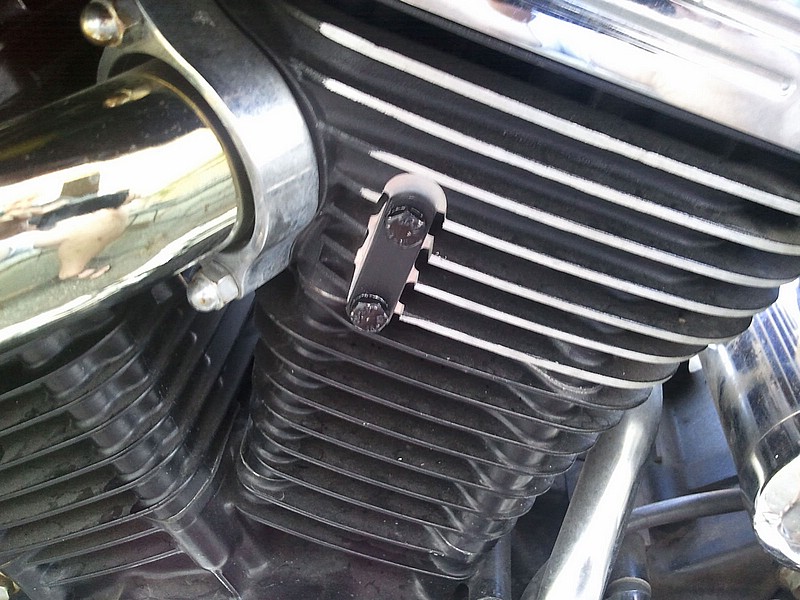
| STEP 4. PLUG THE CYLINDERS |
· For the better appearance, pull the studs from
the cylinder flanges, then use four of the supplied 6mm bolts to
attach the supplied plates and gaskets to the air delivery tube
mounting surfaces on the cylinders.
· Gasket sealer is not necessary, but if you have it, I do
recommend that you use it.
 Front Cylinder - Right side of bike |
 Rear Cylinder - Left side of bike |
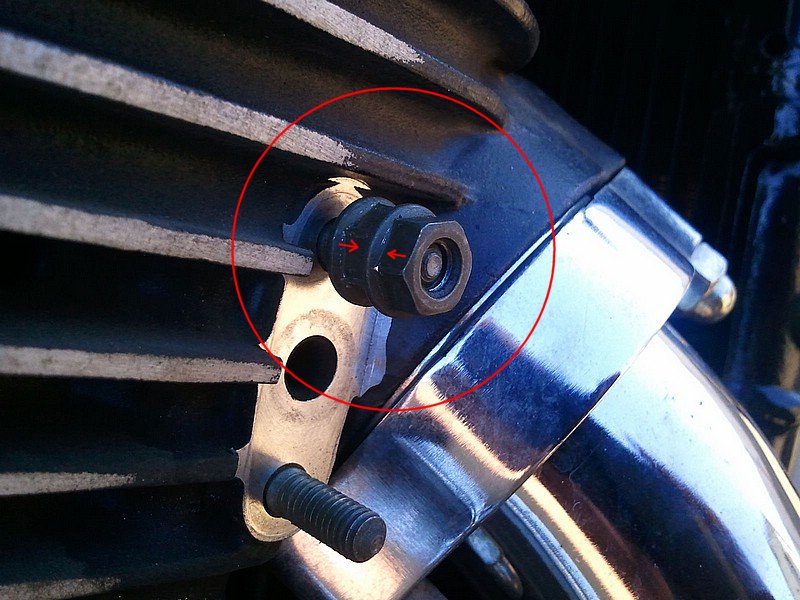
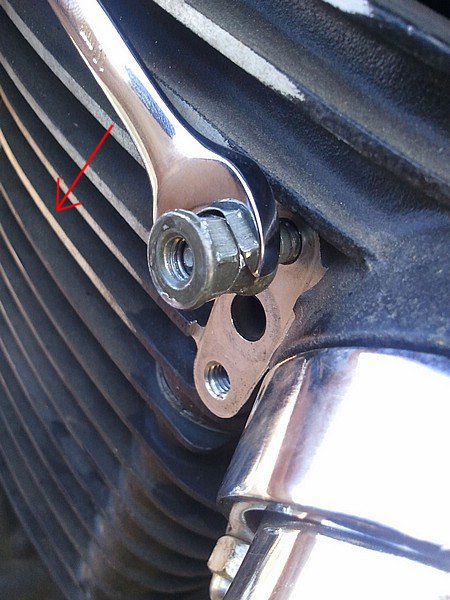
PULLING STUDS: If you haven’t pulled studs before; thread the original two nuts on one stud and tighten them very tightly against each other (opposite directions toward each other), then put a wrench on the inner nut, and as you try to "unscrew" it, the whole stud will unscrew. You may have to apply a little "counter pressure" to the outside nut with another wrench at the same time. It may be a bit difficult to work with the inner nut, due to the proximity of the cylinder fins, but you should be able to unscrew it with the outer nut (I did). Just make sure you get the two nuts very tight against each other first.
 Front Cylinder - Right side of bike |
 Rear Cylinder - Left side of bike |
CAUTION! - Bear in mind that anytime you work with studs, you run the risk of breaking the stud off, requiring difficult drilling and tapping to replace it. Pre-soaking the threads with penetrating oil, and a few light taps straight on the end of the stud will help break loose the hold of any corrosion inside. If the stud seems to require a lot of force, leave it be!
| STEP 5. PLUG THE SCREW HOLES |
| Use the three M6-1.0x10mm (shorter ones) Stainless Steel bolts and lock washers to fill the empty holes in the cylinders left by removing the housing. |
|
| YOU’RE DONE!! Don’t you wish YOU could loose five pounds of ugly fat that easy!!! |
 |
 |
Happy Wrenching!!!J |
|
Use your "Back" button or
Click HERE
to go back