| Truckin' Your Ride!! |
Call me a wimp, call me a wuss, call me anything you want, but when it's all said and done, you can call me practical. As much as I love to ride, there are times when it either isn't fun, isn't safe, or just isn't practical. This page is not about the great debate over whether or not to ride or haul. It's about my experiences in hauling, and an opportunity to pass on a few tips that I have learned, some the hard way, and some by listening to others. Hope it helps!
Truck or Trailer? |
I own both a 6.5' bed Chevrolet Silverado (8' to the tip of the tail gate when down) and a nice two bike chariot style trailer, and I use both, depending on the situation, but given half a chance, I'll take the truck every time if I only have one bike to haul. Trailers are a chore, no matter how large or small, and a properly setup truck is just as quick to load and much easier to drive and park.
|
Settin 'er up!! |
If you're willing to spend $300 to $400 on a safe and simple system, you'll find that loading and hauling even a full size dresser bike is a piece of cake! Except for the fact that I have to first remove my toolbox from the truck, I don't hesitate to slap my Road King in the back and take off for a night time or Interstate drive to some great riding in the hills.
1.) Board the
Floor with heavy plywood. Whether or not your truck has a bedliner, a sheet
of heavy plywood is a huge bonus. It will prevent a bedliner from collapsing
or deforming under the weight of your tires, and it will spread the weight of your bike over
a much broader surface area, protecting the tailgate area as well, and at the
same time, can provide better footing than most floors or liners. You can buy a
sheet of 3/4" or 7/8" exterior grade flooring plywood at most lumber or hardware
supply stores. It will cost around $30 to $40. Now, it's going to present you
with a couple of little challenges, so let's deal with those first.
a.) The plywood needs to be sealed for longevity, so pick up
a gallon of CWF Deck preservative, and mop the plywood down with it. Good stuff!! You can even get it in colors to compliment your
truck! :-)
b.) Just because I had a skill saw and time to piddle, I cut
a 45 degree angle on the tailgate end of the plywood. This ain't necessary, but
it looks good. :-)
c.) Even sealed, the plywood will want to warp as it ages, so
get a couple of 1x4 treated boards, and SCREW and GLUE them across the plywood
at about the one/third mark from the ends. You'll need to cut a gap in the
boards in the center of the plywood, so the bike won't have to ride over them. I
cut the boards after screwing and gluing them to the plywood, just to make it
easier to have everything nice and lined up. (obsessive compulsive disorder). I
also cut the gaps with a 45 degree blade angle so there would be no hard edges
for the tires to get up against during loading.
d.) The plywood is going to be quite heavy and cumbersome, so
while you're at the hardware store, pick up a couple of inexpensive trunk
handles (cabinet hardware) and attach them so you can move the plywood from your
shop to the truck easily.
| e.) Make a place in your shop to store the plywood when not in use. It will store best laying flat up against a wall. I cut some wooden clamping pieces that hold the plywood tight to the wall, so it can't warp in storage. |
|
|
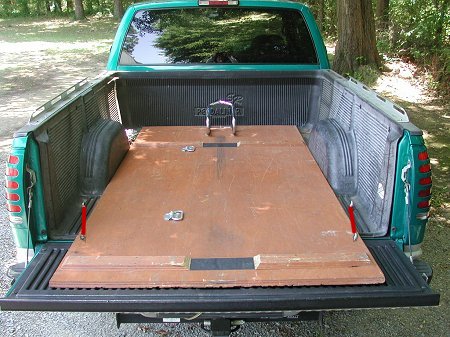
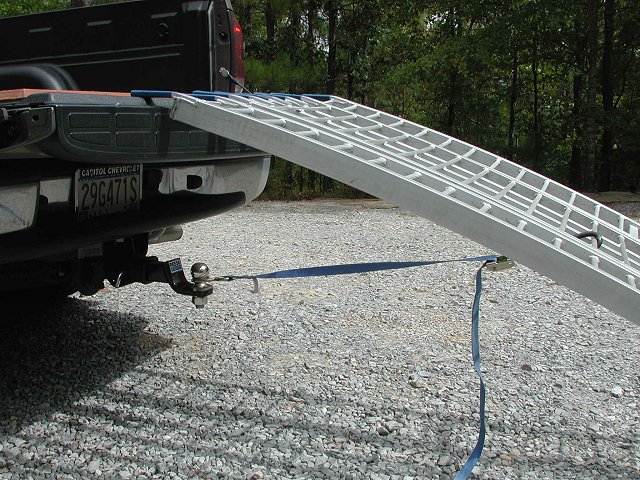
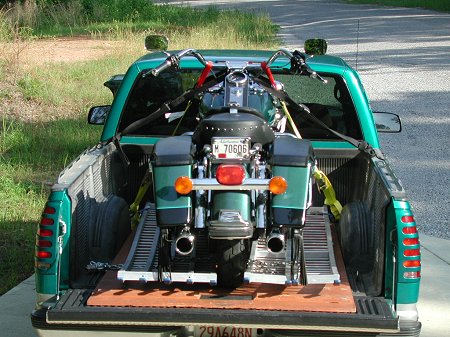
This shot is
my truck with the plywood floor. It simply slides in over my bedliner. You
can see the two cuts I made from the cross pieces (I painted that gap black
because I didn't have any more sealant and I sealed the plywood after the
cross pieces were installed) CAUTION! For an extra measure of safety, use a short section of chain, cable, or strapping as shown above in red, to secure the plywood to the bed of the truck. This will prevent any potential slippage under the front wheel while offloading the bike..
When off-loading the bike, place
the transmission in second gear, and feather the clutch to create a rear
hand brake |
2.) Runners for the bike are not necessary, and I would actually discourage their use.
Runners can cause an accident during loading or unloading if the bike isn't
perfectly lined up. It doesn't need runners. They will only add weight and
aggravation.
3.) Chock it up. At the very least, spend $40 on a Pingle
(shown above) or similar
fixed wheel chock and bolt it to the plywood. Locate the bolts so they protrude
into the low ridges of the truck bed or bed liner so the plywood will lay flat
and not damage your flooring.
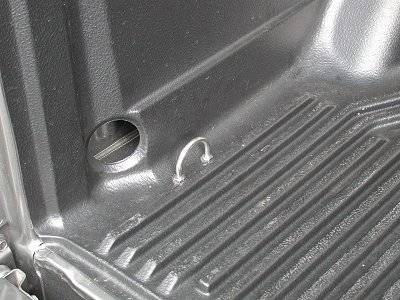
|
4.) Tie Points. If your truck is not already outfitted with strong tie hooks in the bed, install a set of large stainless steel eyebolts or stainless U Bolts through the truck floor in the front and rear areas in front of and behind the wheel wells. You want to tie the bike to the truck, NOT the plywood. |
|
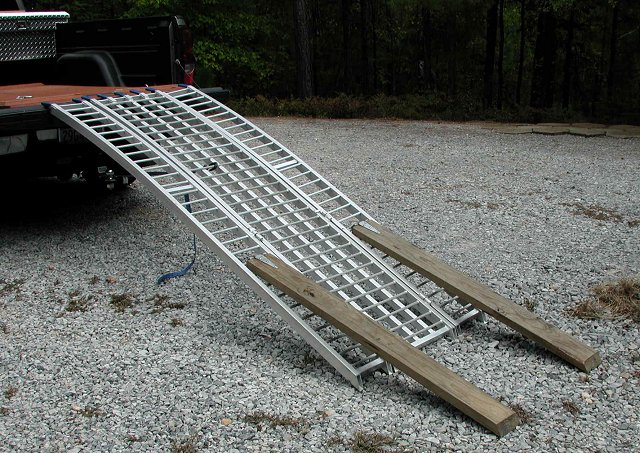
5.) RAMP IT: Spend $250 to 350 or so on a high quality, curved, three foot wide, eight foot long (minimum) ramp. With a 4x4 or high bed truck, you'll still need to "cheat" a bit to lessen the load angle with an eight footer. This can be done by backing up to a curbed lawn or slight embankment, or putting your truck's front wheels up on a curb or embankment. You will find that with proper SAFE ramp use, RIDING the bike into the truck is as easy as riding it into a garage! My "Black Widow" ramp is a three piece affair that folds or disassembles into three 8 foot narrow sections, and stores easily beside the bike in the truck. For taller 4x4 trucks, I'd recommend the folding 9' model for a better load angle.
|
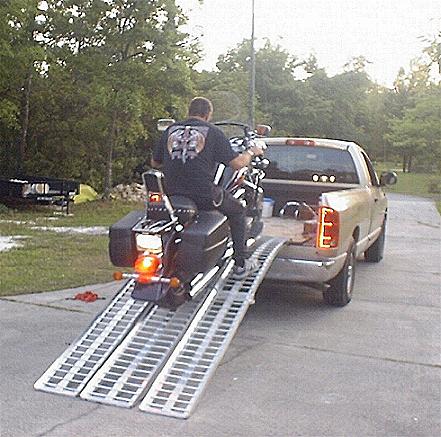
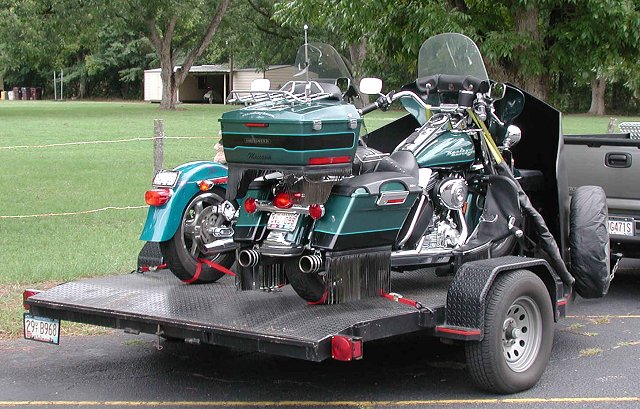
This shot is
not me, but is the same setup, and shows a rider driving the bike into the
truck. |
| When placed against the tailgate, THE RAMP MUST BE SECURED! This is easily and quickly done by taking one of your tie straps and hook it through one of the rungs of the ramp, and hook the other end to a hole in the bumper, a trailer hitch or under the edge of the bumper, then cinch it up. This prevents the ramp from slipping off the tailgate and out from under the bike while accelerating up into the truck. |
|
6.) Spend $40 on a set of 1.5" wide RATCHETING tie downs for the front of the bike. These will make tying the bike in much easier and safer. And back them up with a pair of inexpensive cam lock ties. Pull the bike down first with the ratchets, then follow that with the cam locks, then when you're ready to release the bike, release the ratchets first and finally the cam locks.
|
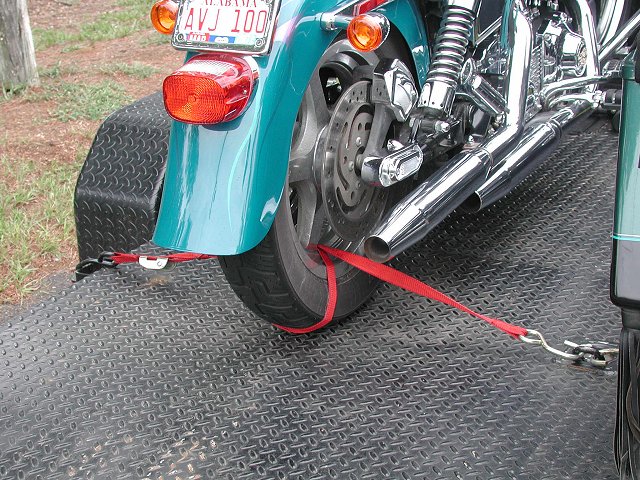
It's a good and safe idea to tie the rear wheel in place as well, as it can shift or lift during even the smallest of fender benders, unfriendly railroad crossings, or those ever present killer potholes! If nothing else, run a strap from one side of the truck or trailer to the other, looping around the bottom of the rear wheel along the way. This will prevent the wheel from shifting |
|
|
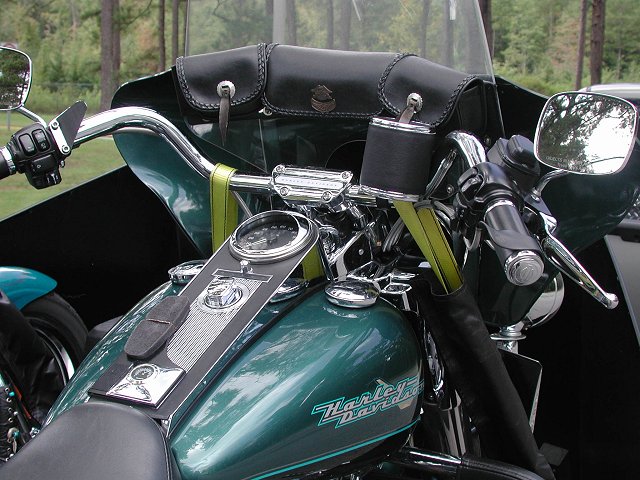
The bike is tied with pressure pulling it downward and forward into the chock. I compress the shocks about two thirds of the way and she'll ride comfortably all day that way. I normally loop the tie straps over the lower bend of the handlebars. Some people preach to never use the handlebars, but they are the most stable point on the bike to tie to, since they are at the tallest point. Just don't tie to the outer bends or grip areas, because the leverage will be too great for the strength of the bars. Always use the lower bends, near the forks, and be careful that the strap doesn't touch any part of the bike when cinched, or it will rub the hell out of it. |
|
|
|
|
|
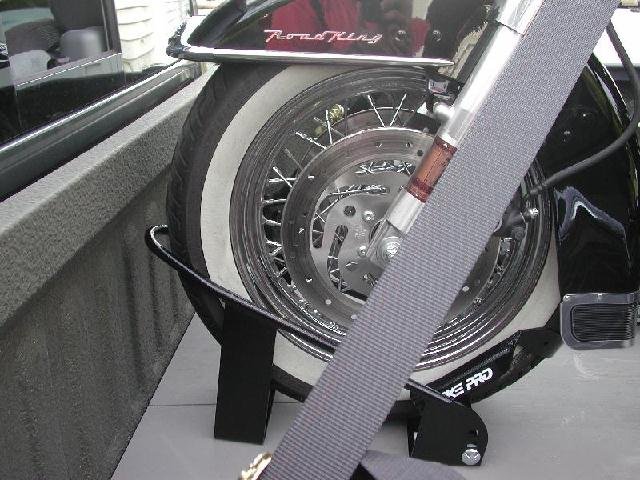
Upgrade the chock! As soon as I learned how easy it was to load and unload from the truck, I upgraded the wheel chock to a free standing LA Chock from Baxley Trailer Co. Using the free standing chock allows me to keep the handling weight of the plywood down and also the ability to use the chock in the garage as well. The photo above shows a different brand attached to the plywood. Clamping chocks add a huge safety and convenience factor to self loading and unloading! (photo for visual reference - Tool box is normally removed for bike hauling) |
|
|
|
When parked, I
keep the ramp chained and locked to one of the u-bolts in the floor of the
truck. :-)
Here's a link to the 8 foot arched ramp that I use. There are lots of other options with
ramps, but this one makes life on the road a breeze!! :-)
http://www.discountramps.com/non-folding-motorcycle-ramps/p/MC-RMP-NF/
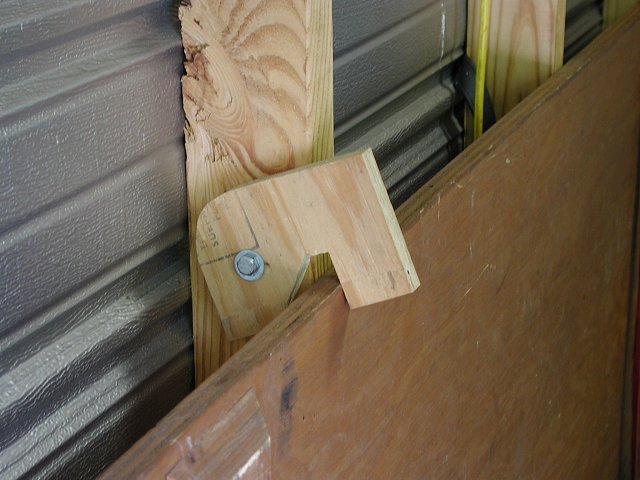
TAIL GATE
SUPPORT!! If you have any concerns at all about the ability of your tailgate
cables to accept close to 1000 lbs of load weight, take a look at this dirt
cheap insurance from
DGManufacturing Great product!
As for using a winch. If you feel the need for a winch, make sure it's mounted
to the truck and not the plywood. Your bike would rip it right off the plywood.
I've used my ramp in my two wheel drive Silverado and a couple of 4 wheel drive
trucks, and I just look for a slight hill or embankment with the 4 wheelers so
the bike doesn't bottom out going over the top edge of the ramp, but a nine foot
ramp would be better for those who own 4x4s.
On a 6 and a half foot bed, your rear wheel should ride just on the forward end
of the tail gate, and the plywood will give it plenty of support. Just make sure
you secure the ramp
to the truck's bumper or trailer hitch with a tie strap before using it, so it
doesn't slip while loading or unloading.
Here's a tip for cheating that "point of no return" spot where your feet don't touch....
| Cut a pair of 4 foot long 2x6 boards and drive a pair of heavy nails half way in near one end of each board. When you set your ramp up (don't forget to strap it to the bumper or hitch so it can't move!), lay those short boards near the bottom of the ramp, with the nails sticking through the rungs of the ramp as if you're setting up two mini-ramps. These boards will bridge the gap for your feet. When you ride your bike up the ramp, your feet can walk those boards until the rear wheel reaches the ramp. You'll be surprised at how easy and safe it is to ride a bike up into a truck if you set it up properly. | ||
|
|
|
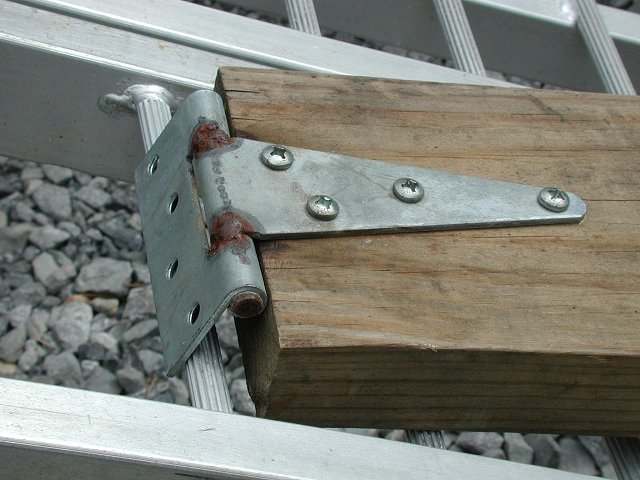
I welded some hinges to catch the rungs, but nails will work just as well. |
|
|
|
I also own a chariot style open trailer for two bikes, but when I only need to haul one, it goes in the truck! Trailers are a pain to negotiate with! |
|