Tire Change, Part III
|
Changing your own rubber
|
|
You can save a lot of money by taking your wheels in for tire
changes, rather than the whole bike, but some shops are reluctant to
change out tires that they did not sell, and many of those that do get a
hefty charge for change labor since they can't make anything off tire
sales. Some shops change the rubber for free if you buy the tires there,
but they charge considerably more for tires than you can find them at
other places (nothing is free).
Whether or not it's wise to invest in tire changing tools will depend
a lot on how often you need to do that kind of work, and what your time
is worth to you. You can spend a lot of money on professional tooling,
or you can go with low budget Harbor Freight type stuff. It all works,
but the more you spend on tools, the easier the job gets. That being
said, it ain't a HARD job even with just very basic tools.
In my own experience, by purchasing a set of tires online, on sale
and with free shipping, I saved enough on ONE 2-tire change to pay for
my Harbor Freight changer, motorcycle adapter. We own two bikes and my
wife and I go through tires pretty regular, so on the next tire change,
I will save enough to pay for my No-Mar upgrade tire bar, lubricants and
a tire spoon (lever). After that, I'm coasting my way through tire
savings!
I want to take this opportunity to thank my friend "Hamshog" for
allowing me to use his photos from a recent tire change that he did on a
Harbor Freight changer. He prefers not to use the top cage that comes
with the motorcycle adapter, and prefers not to use the tire bar on the
final bead, so his technique may vary from some others that you will
see. You just have to go with what works best for you. There are other
sites online as well that will guide you along the process, and we'll
link a couple of them here as well. Hamshog runs tubed tires, but the
procedure for tubeless is the same, just without the tube.
|
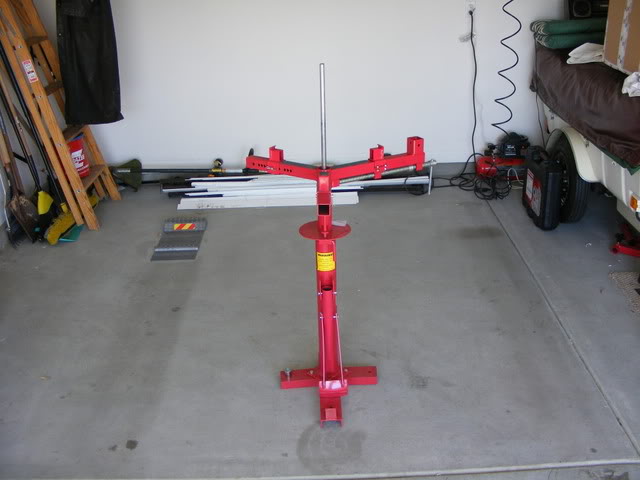
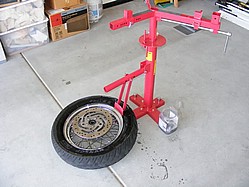
Tools recommended:
Harbor Freight or equivalent tire changer with
motorcycle adapter.
One or two Tire spoons
Tire & Wheel Lube (paste and spray)
Valve Core Tool
Ratcheting Tie-down Straps
|
 |
|
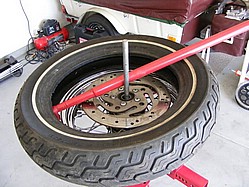
First order of business it to break loose the
bead on the old tire. Use the bead pusher attachment on the
changer and the tire bar for leverage.
Place a length of 2x4 under the backside of the
wheel so the rotor doesn't rest on the floor. Work the bead down
with the pusher on both sides of the tire.
Use soapy water or tire lube to help with the
process.
|
|
|
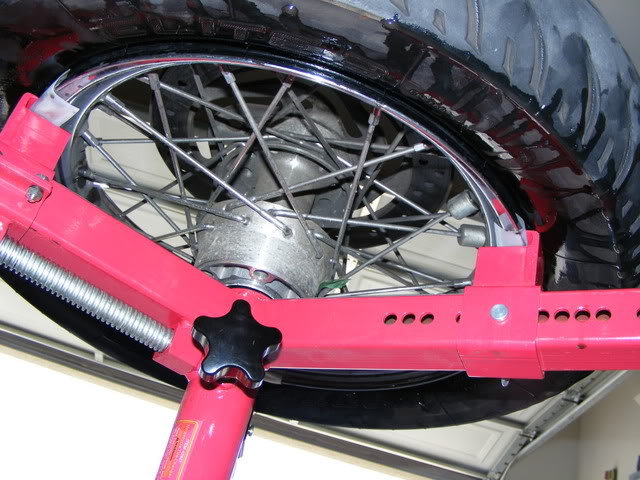
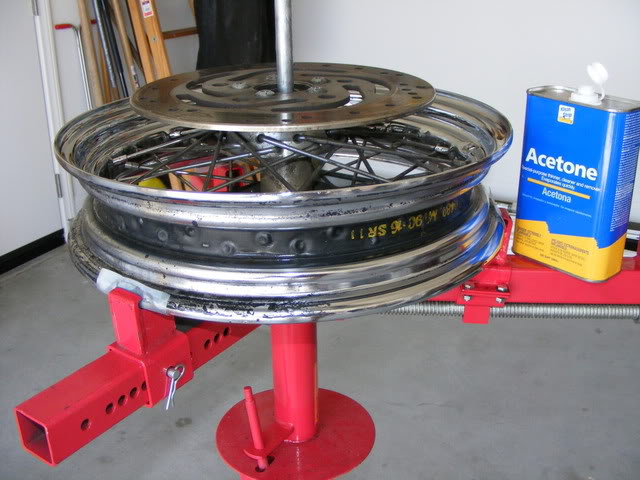
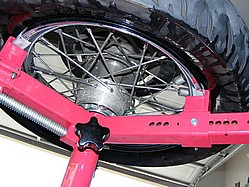
Next, secure the wheel to the changer
platform as per instructions with the changer. To avoid damaging
your chrome or polished rims, use strips of plastic, or leather
between the rim and the clamping blocks, or coat them well ahead
of time with liquid plastic coating.
The Harbor Freight wheel blocks are not high
enough to permit wheel mounting without first removing the drive
belt pulley from the rear wheel. However, with care, you can
leave all brake rotors in place.
|
|
|
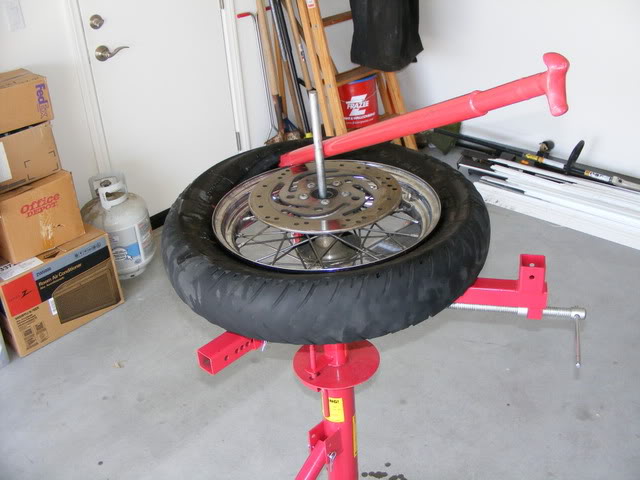
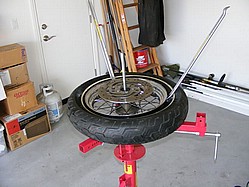
Remove the top bead with the tire bar as per
instructions with your changer. The flat end is for bead
removal, and the "T" end is for bead installation.
After you insert the bar into the tire and lever
the edge of the bead over the rim, hold the opposite end of the
tire down in the middle of the rim while you pull the tire bar
around the center pole.
Tire lubricant is your friend!!
|

|
| If you run tubed tires, remove
the tube and valve stem now. |
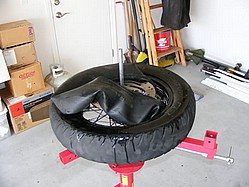 |
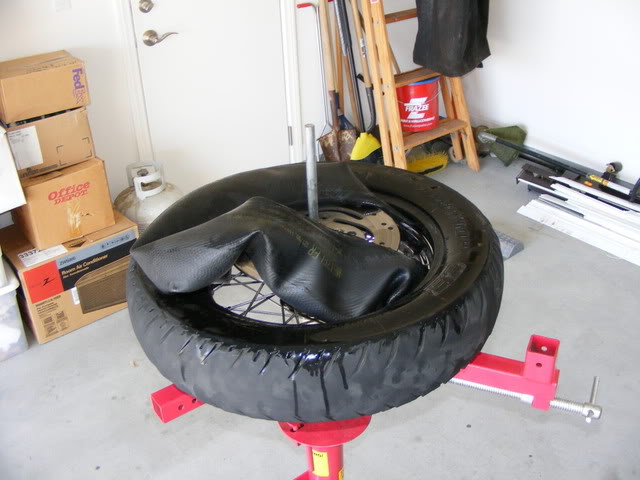
| Now use your tire bar again to
pull the lower bead off the top of the rim, following the same
procedure as you did with the top. Be VERY careful not to put
any pressure on the brake rotor with the tire bar!! It WILL
BEND! |
 |
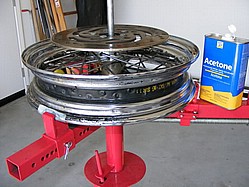
| Any foreign (or domestic)
matter or debris on the rim will set the stage for constant air
loss later, so take the time to clean the rim with acetone or
other strong cleaner.
Tire lubricant gel should be wiped around the rim and bead
area prior to tire mounting. |
 |
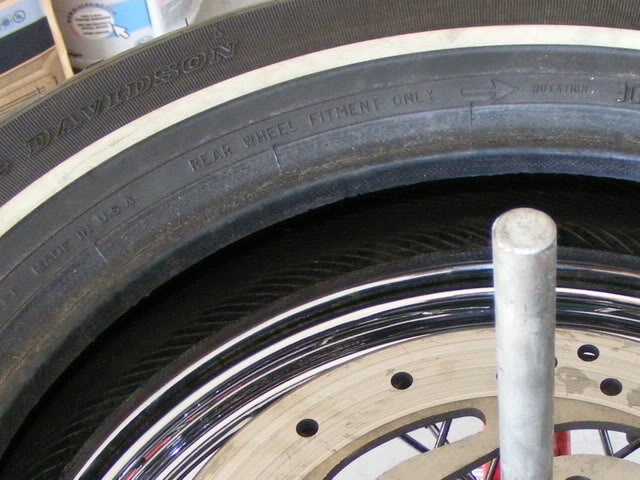
| Most motorcycle tires are
directional in tread pattern and are only supposed to be mounted
one way. Make certain that you are not installing your tire
backwards!
Look on the tire for the directional information and mount it
accordingly. |
 |
| Push the tire's lower bead as
far onto the rim as you can, and hold it there while you insert
the mounting "T" end of the tire bar under the rim and over the
bead, the push the bar around the center pole in the opposite
direction that you used to remove it. |
 |
| For tubed tires,
insert the tube now and secure the valve stem. Push the tube
fully into the tire cavity and make sure that it is not twisted
or kinked. Some people prefer to inflate the tube at this point
to smooth it out, the deflate it again in preparation for
mounting the second bead of the tire. |
| Mount the final bead on the
rim by again, pushing as much of the bead on the rim by hand,
then holding it into the center, deeper area of the wheel, while
you use the tire bar to finish the job. Hamshog prefers to spoon
the final bead on, probably in an effort to more carefully avoid
damaging the tube. Use whatever technique you're comfortable
with. |
 |
Air it up to
specs and visually inspect the tire all the way around both
sides of the rims to make sure that the bead is properly seated.
If it is not properly seated, you may need to slightly
over-inflate the tire to pop the bead uniformly in place. Do
this carefully and don't use any more pressure than you
absolutely have to!
|
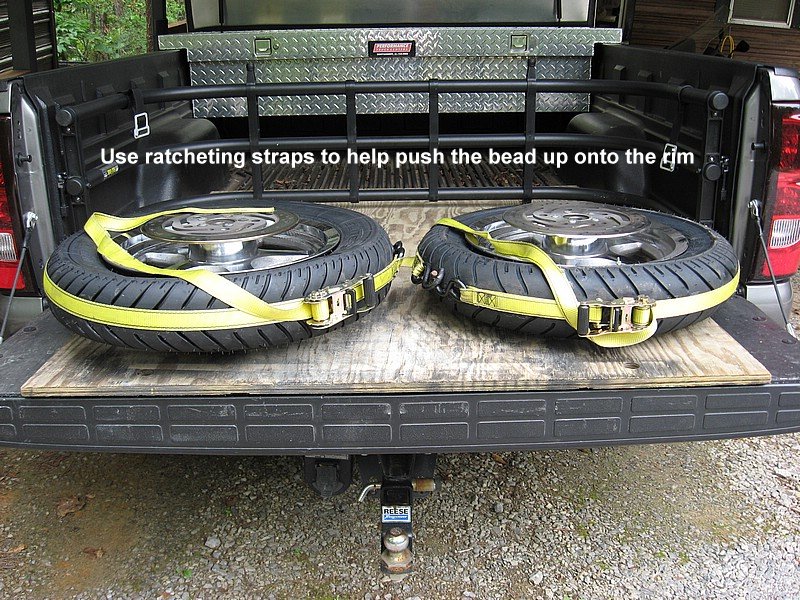
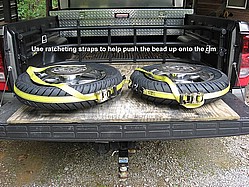
| Here's a Tubeless Tip from me.
To help push the beads out to the bead seating area so the tire
will take air, wrap a ratcheting tie-down strap around the
circumference of the tire and cinch it down tightly to compress
the tire, forcing the beads outward toward the edges of the rim.
If you still have an air leak somewhere and can't get the
beads to seat, move the ratchet around to another part of the
tire, and keep doing this until it takes air. |
 |
| Take an easy test
ride and allow rainy-day braking distance until you are
confident that your tires are scuffed in and your brake pads are
properly seated.
|
Because my rims are chromed aluminum, they are more easily damaged by
unprotected tire bars and spoons, so I upgraded my tire removal system
with the purchase of a No-Mar
tire bar. No-Mar Tire Changer.Com has some great tire changing tools and
materials, as well as some awesome D-I-Y videos online at their site.

Click here to go
to Fred Harmon's site for more tire changing pics and tips.
Back
to Rear Wheel Page
Back
to Front Wheel Page
|